

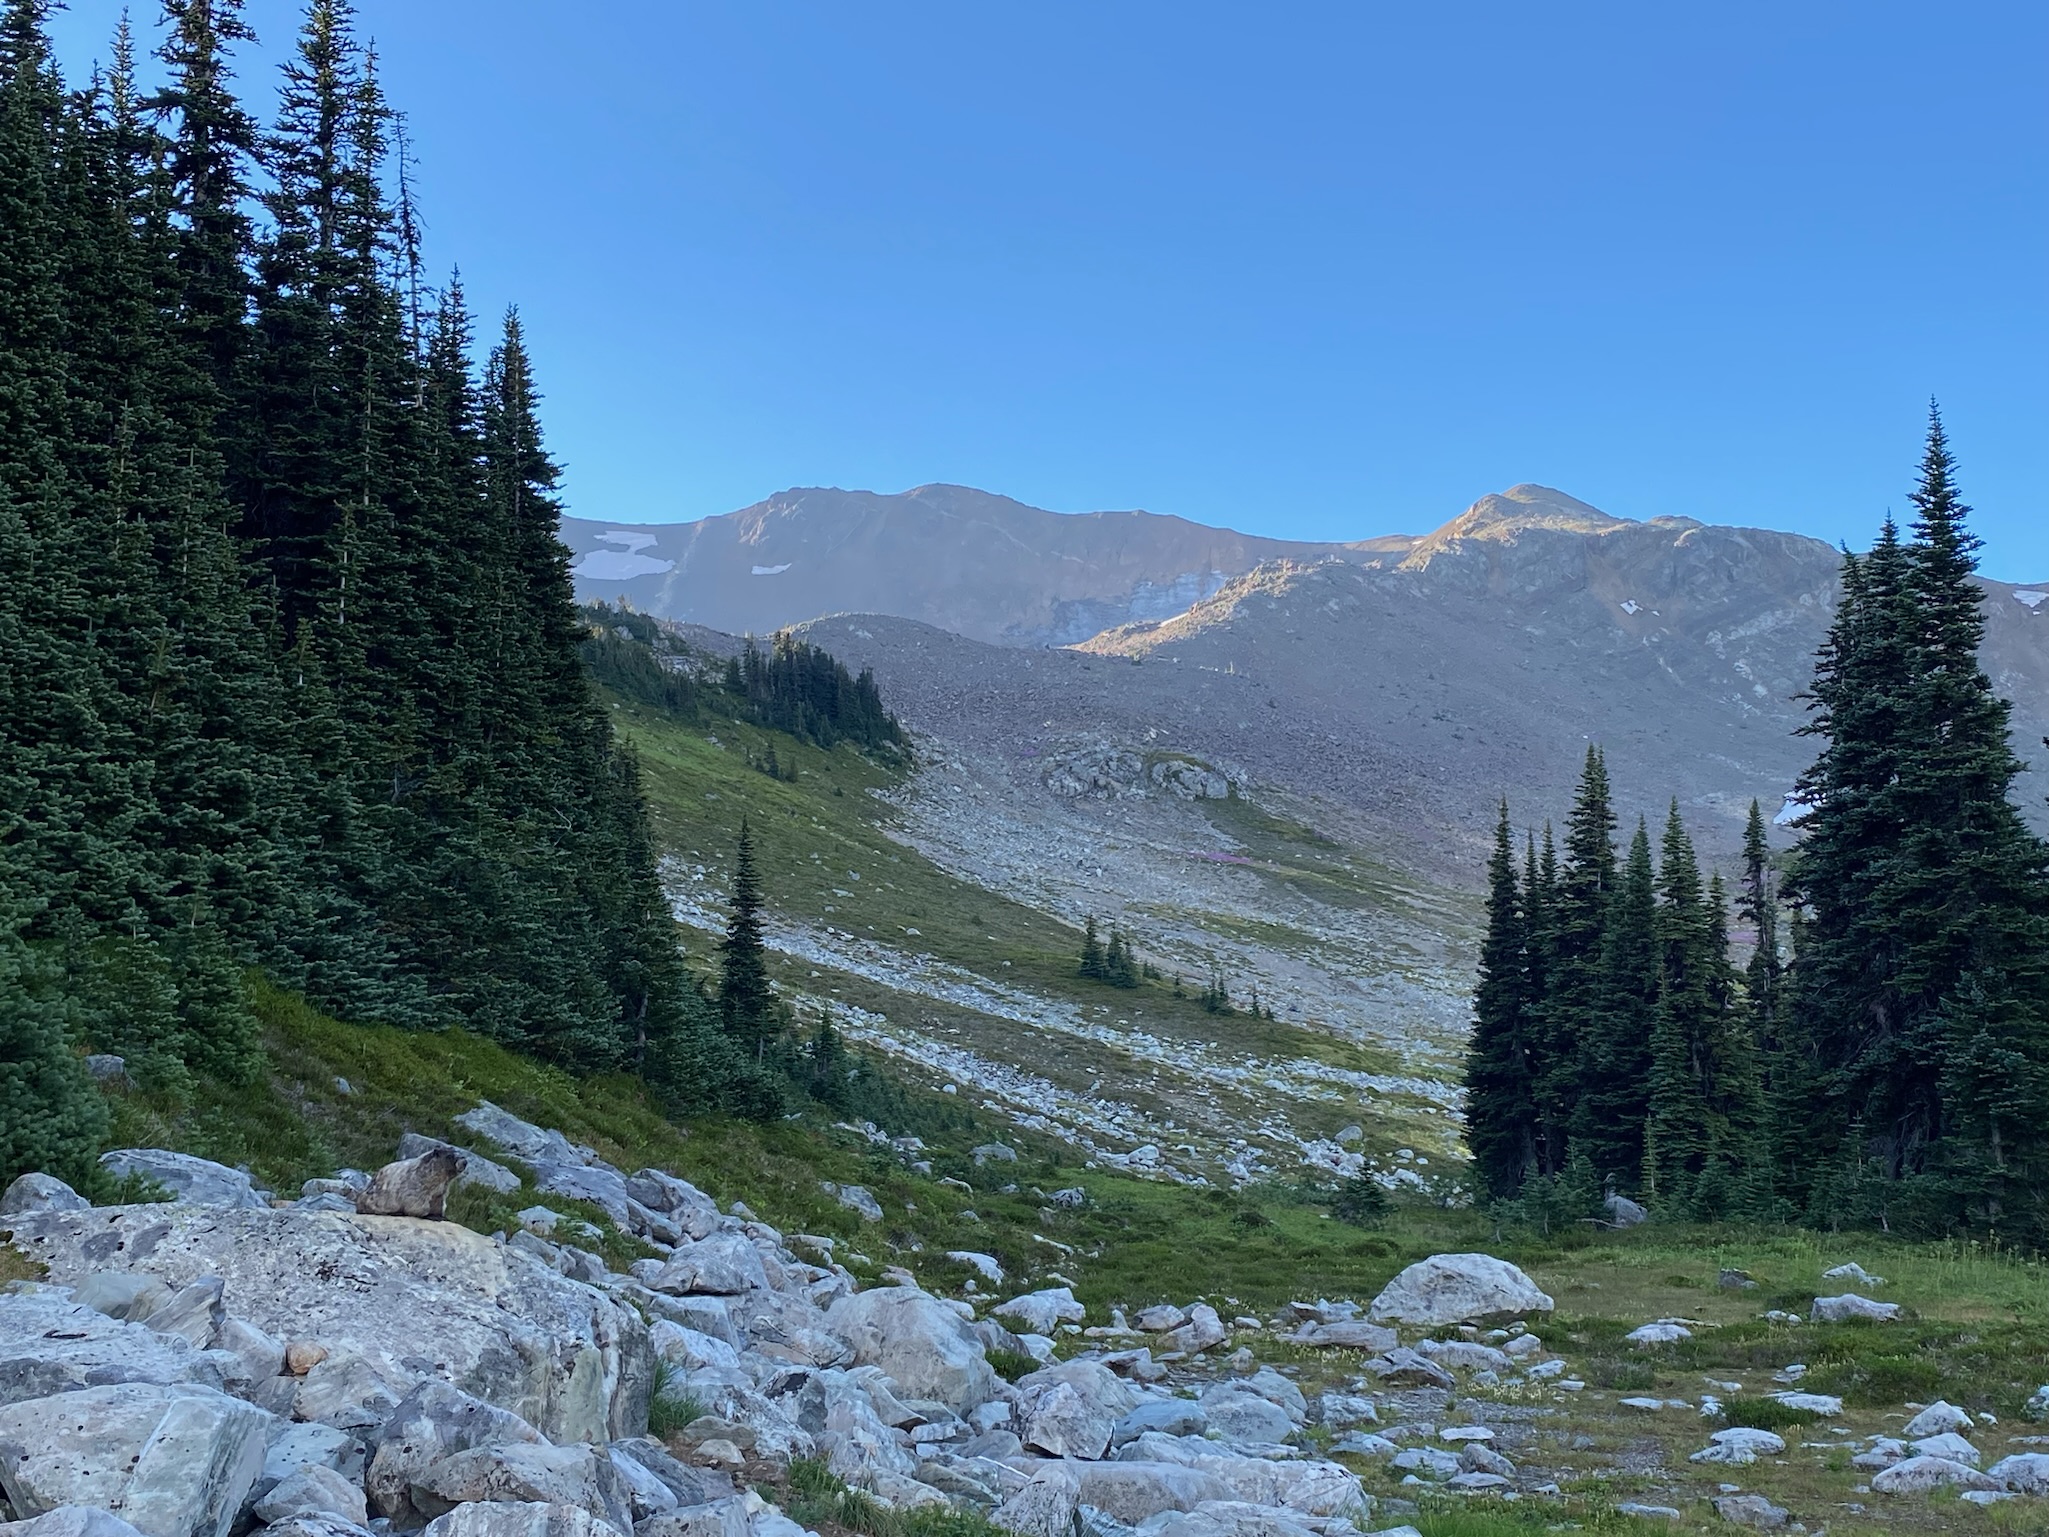
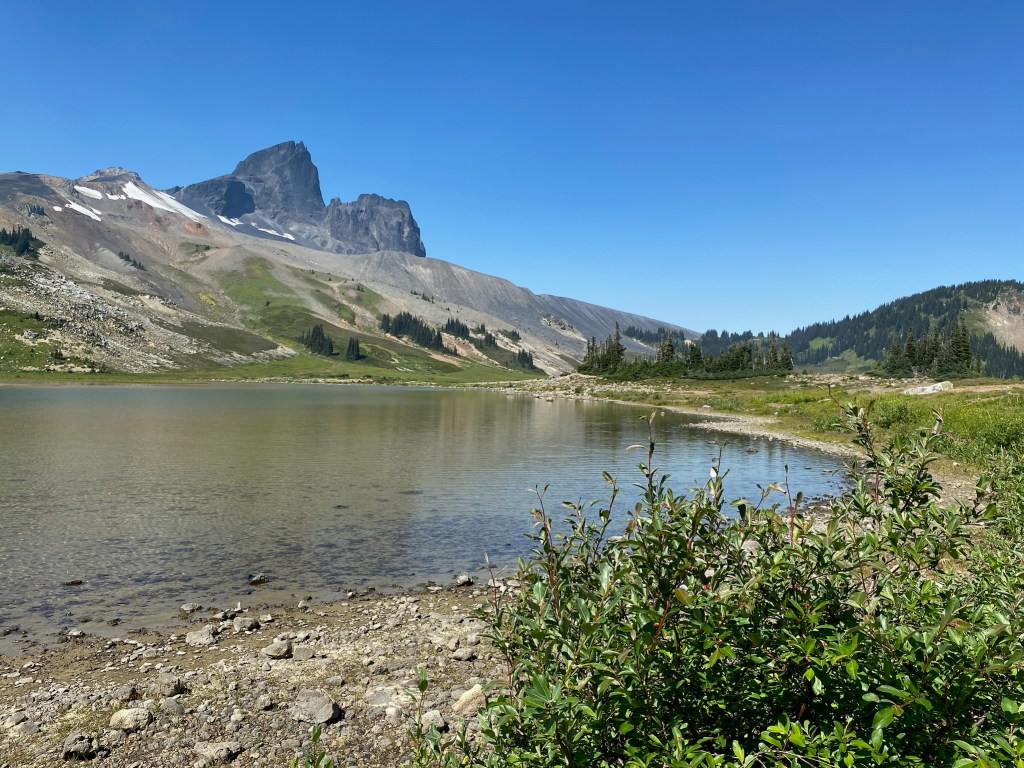
Panorama Ridge, oh how you stole my heart.
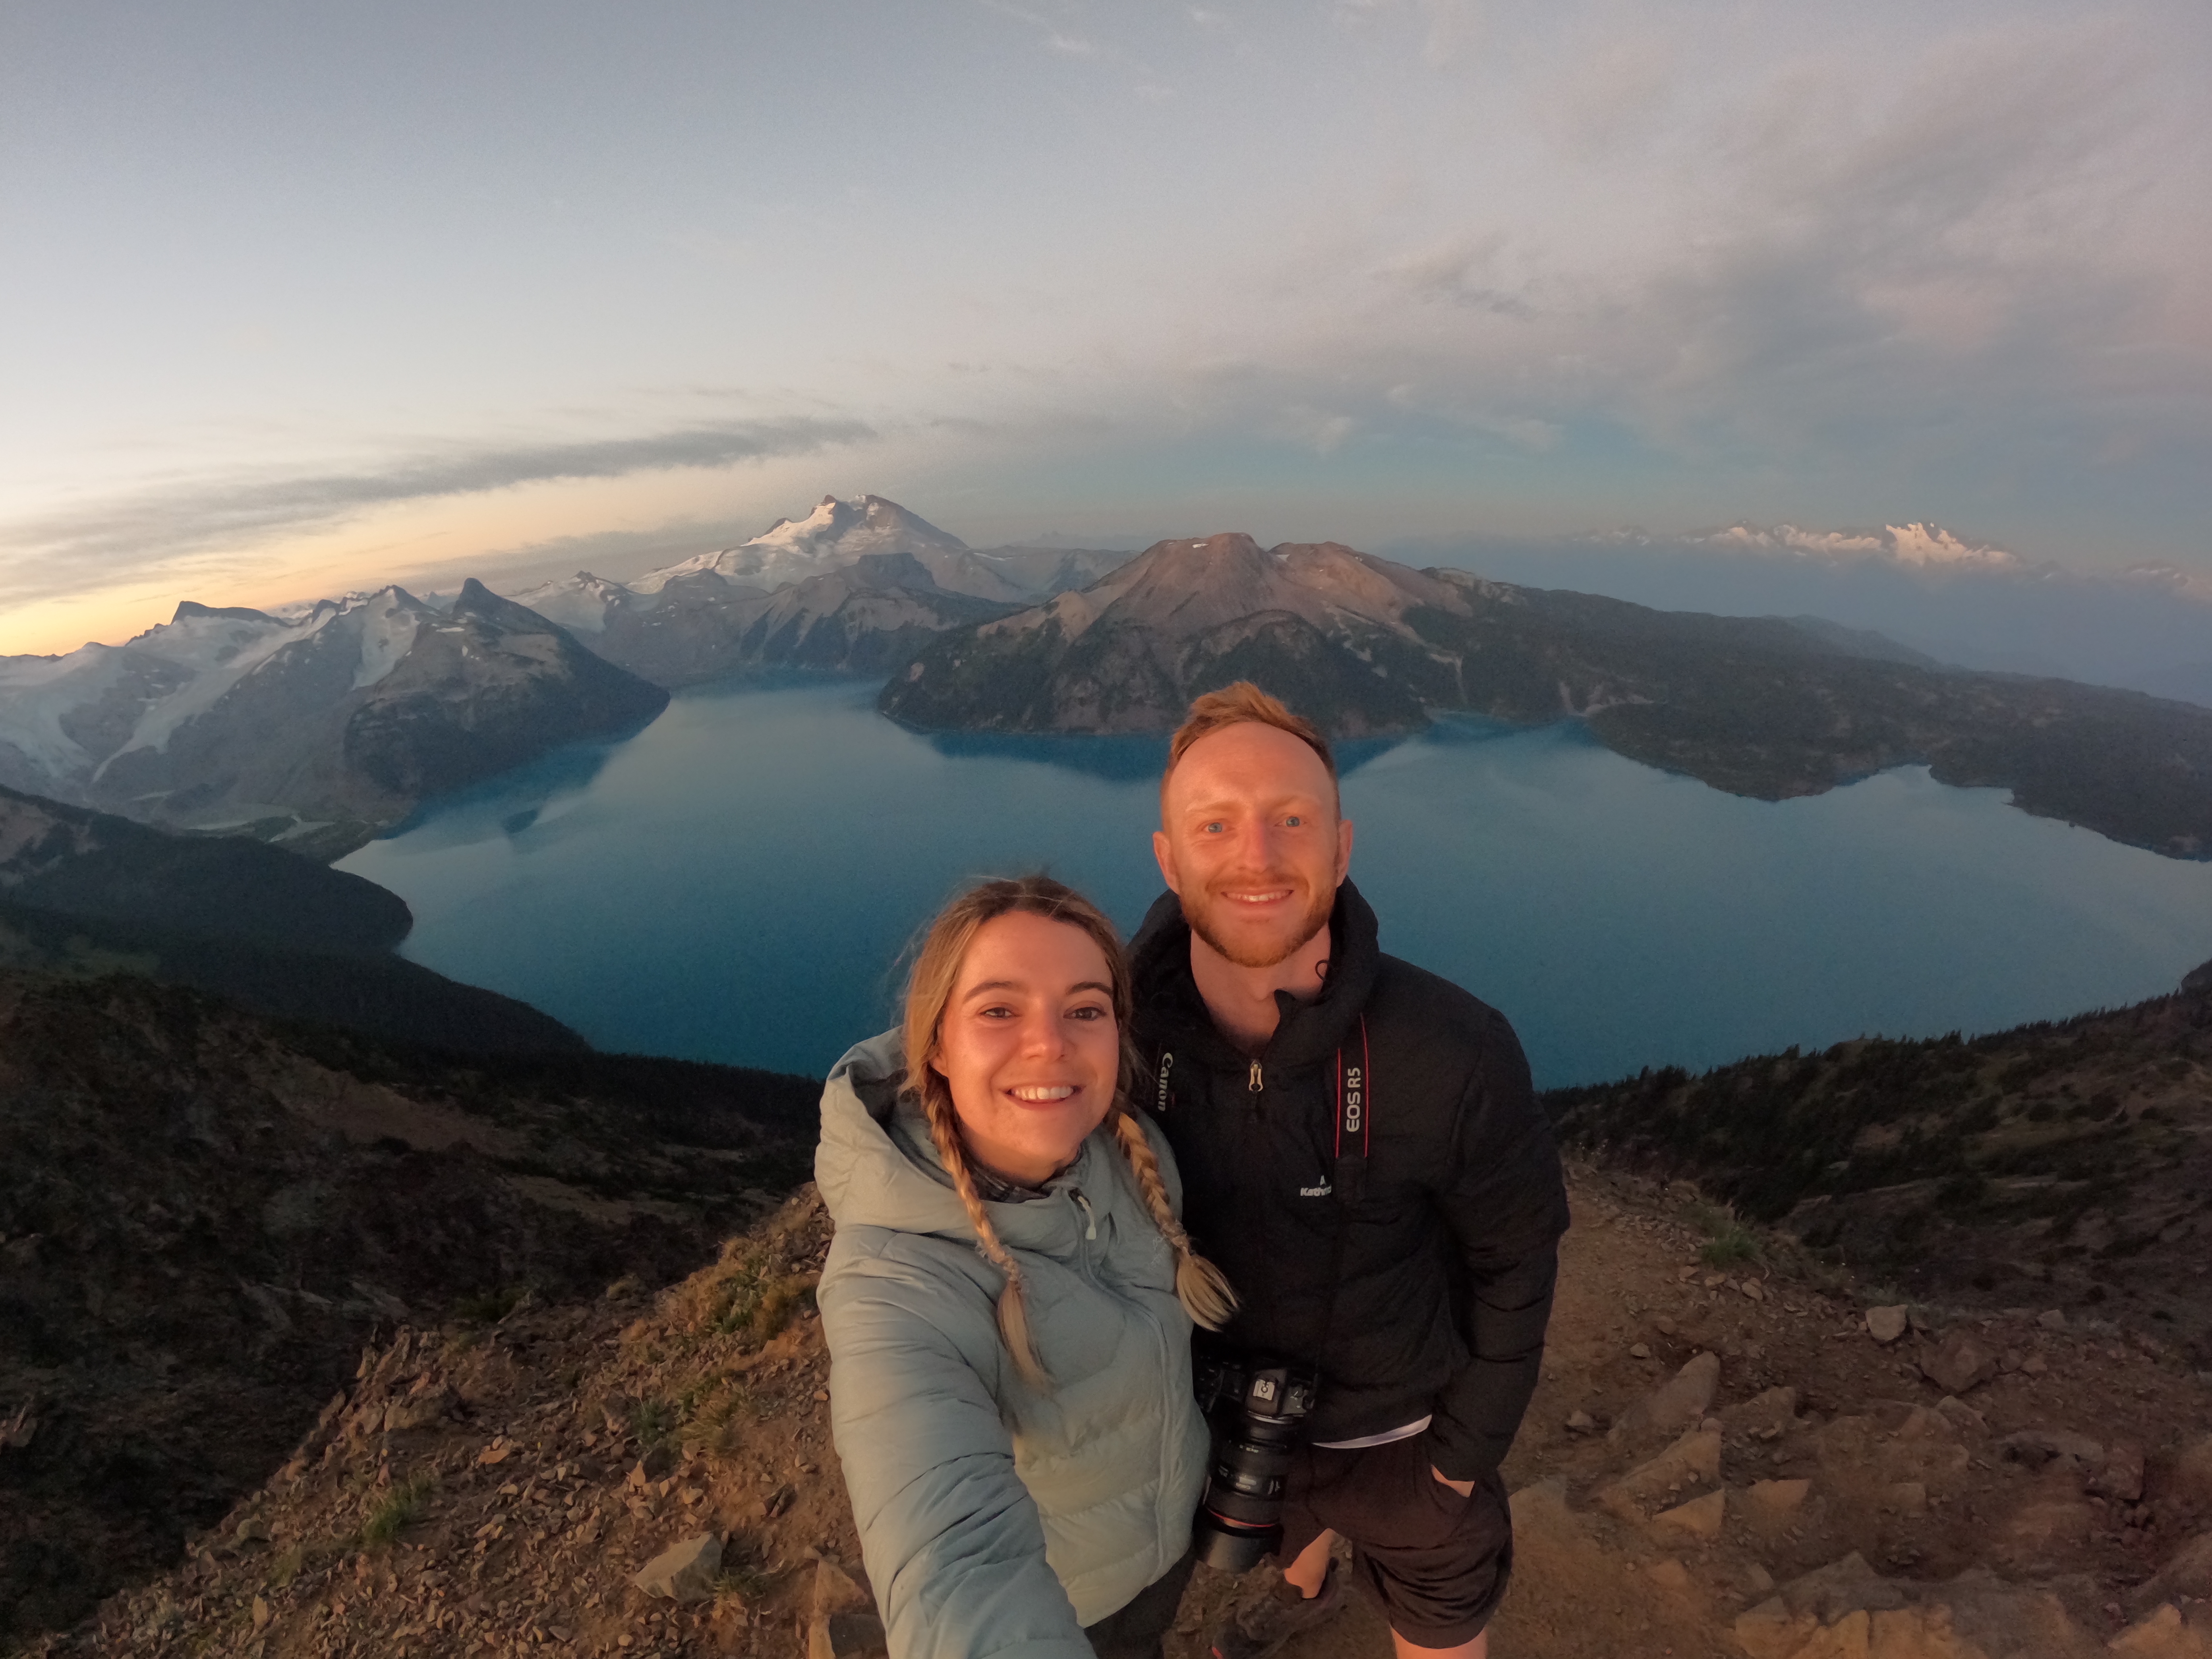
If you are to choose any long hike on your trip to British Columbia, this has to be it. The view at the peak is phenomenal and something you can’t miss. No honestly you just can’t.
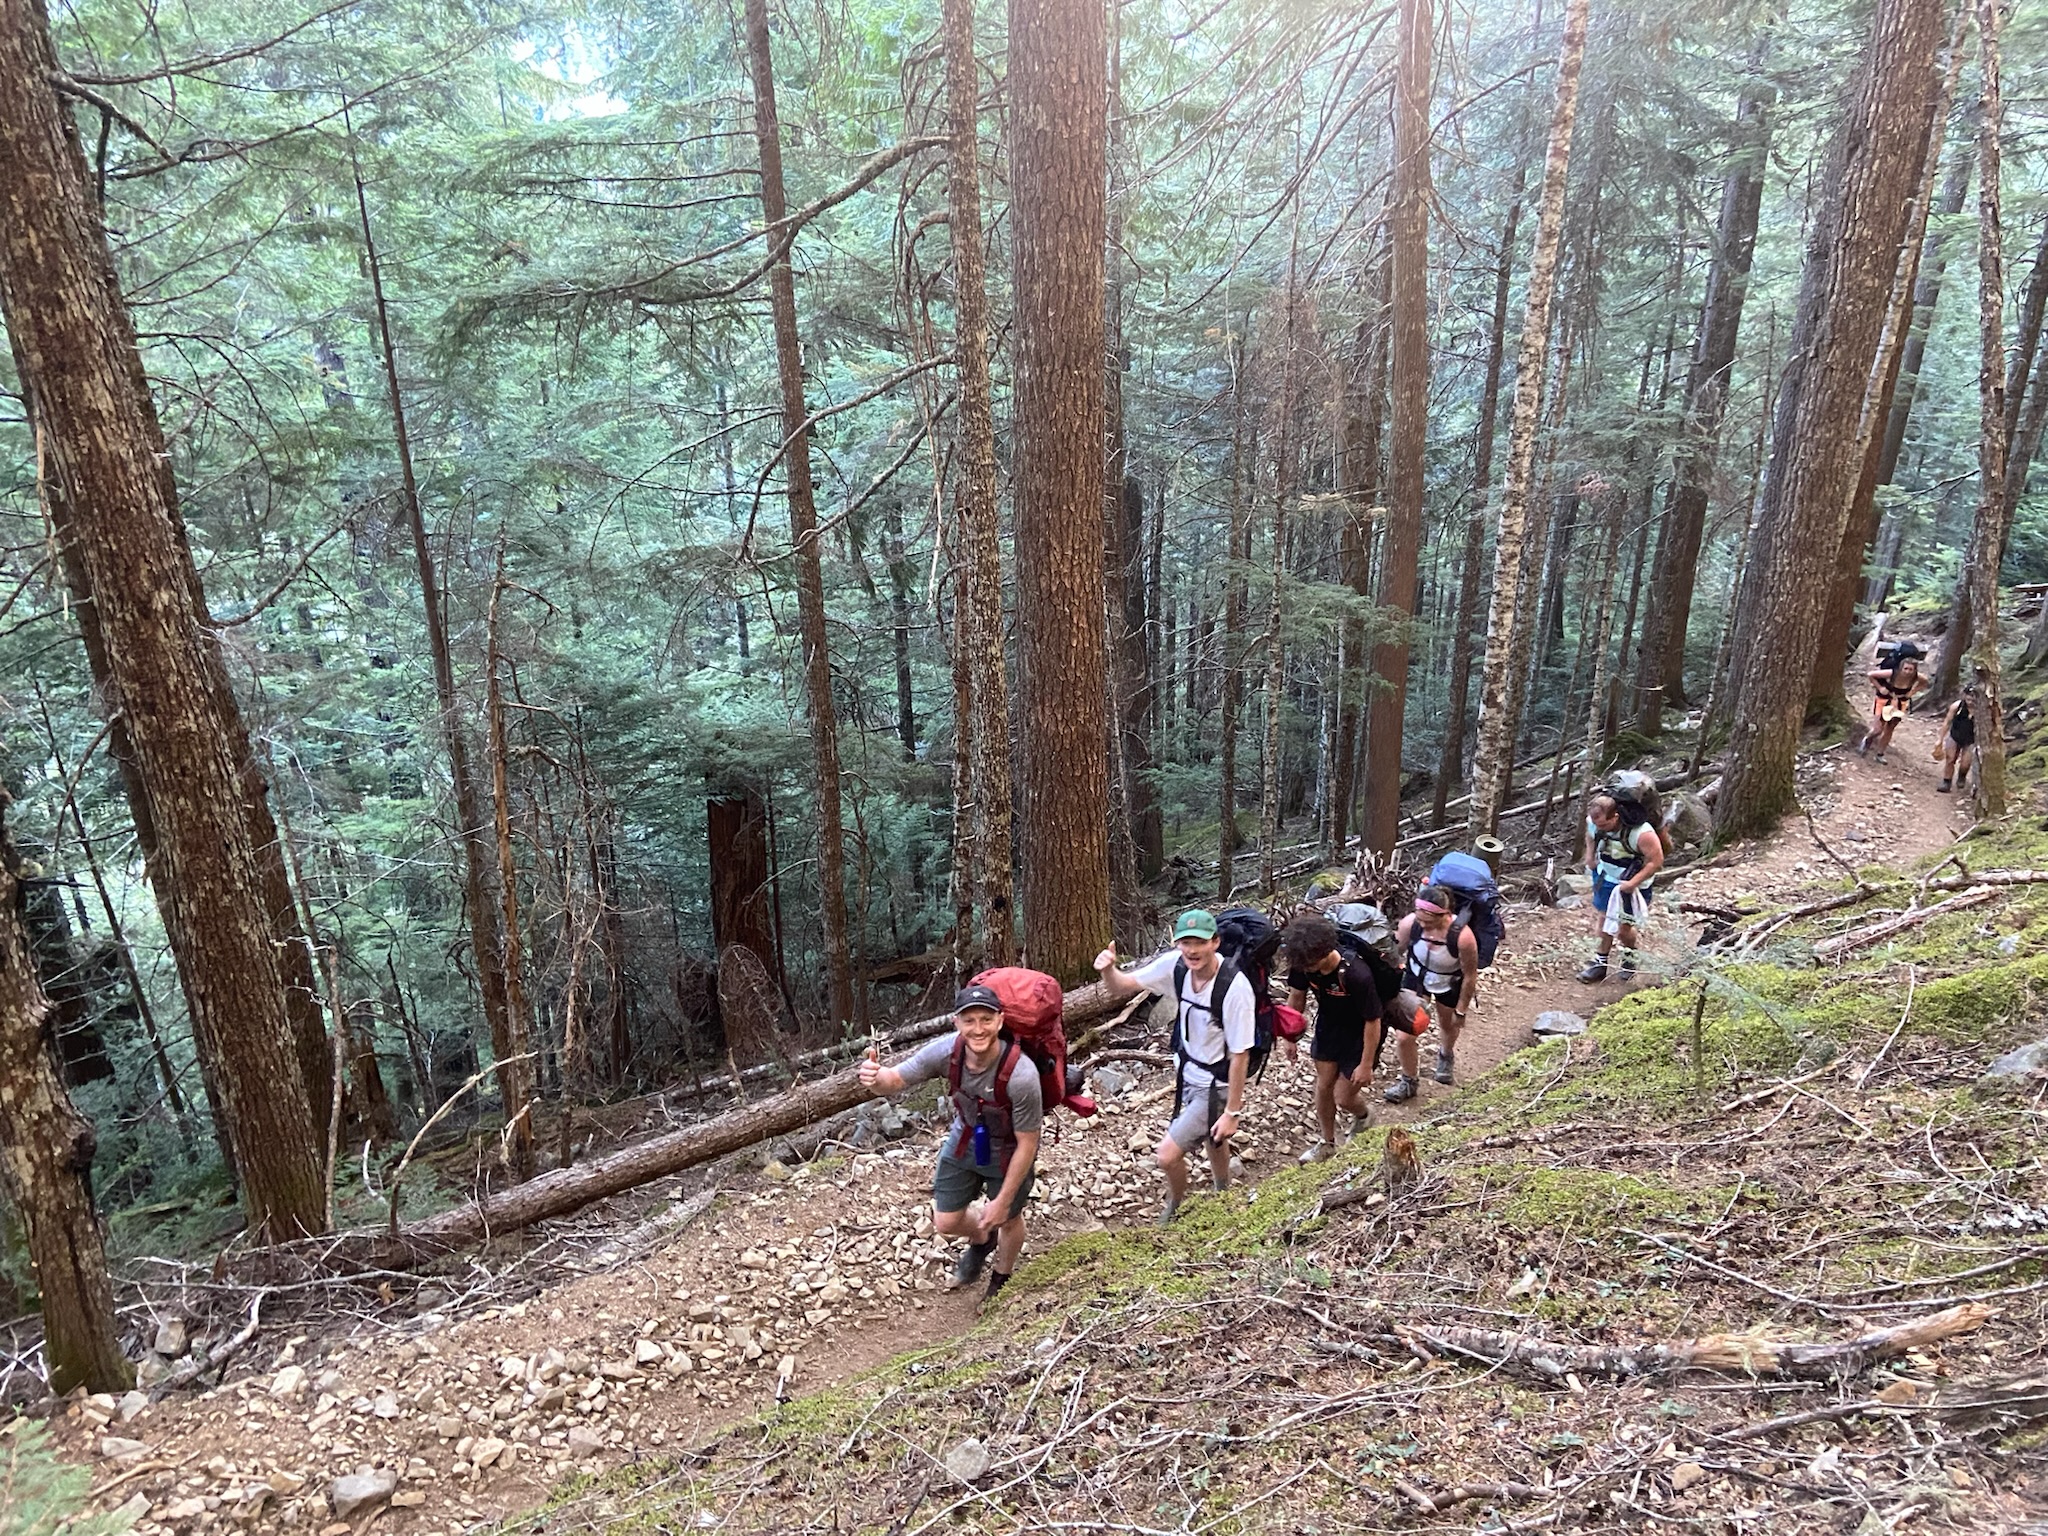
It certainly isn’t for the faint hearted, but if you are prepared and understand the feat you have ahead of you not only will it be a great achievement but a glorious adventure!
Where is Panorama Ridge
Panorama Ridge lives in the grand Garibaldi Provincial Park, at a size of 1950km² it spans from Pemberton all the way down to Squamish. It is an outdoor adventurers playground with mountain peaks and glacial lakes to explore. It is known to be one of the most visited Provincial Parks in British Columbia and when you see the views, you will see why!
How to Get to Panorama Ridge
It goes without saying it is a long hike within the park to get to Panorama Ridge but there are two different trail heads where you can start.
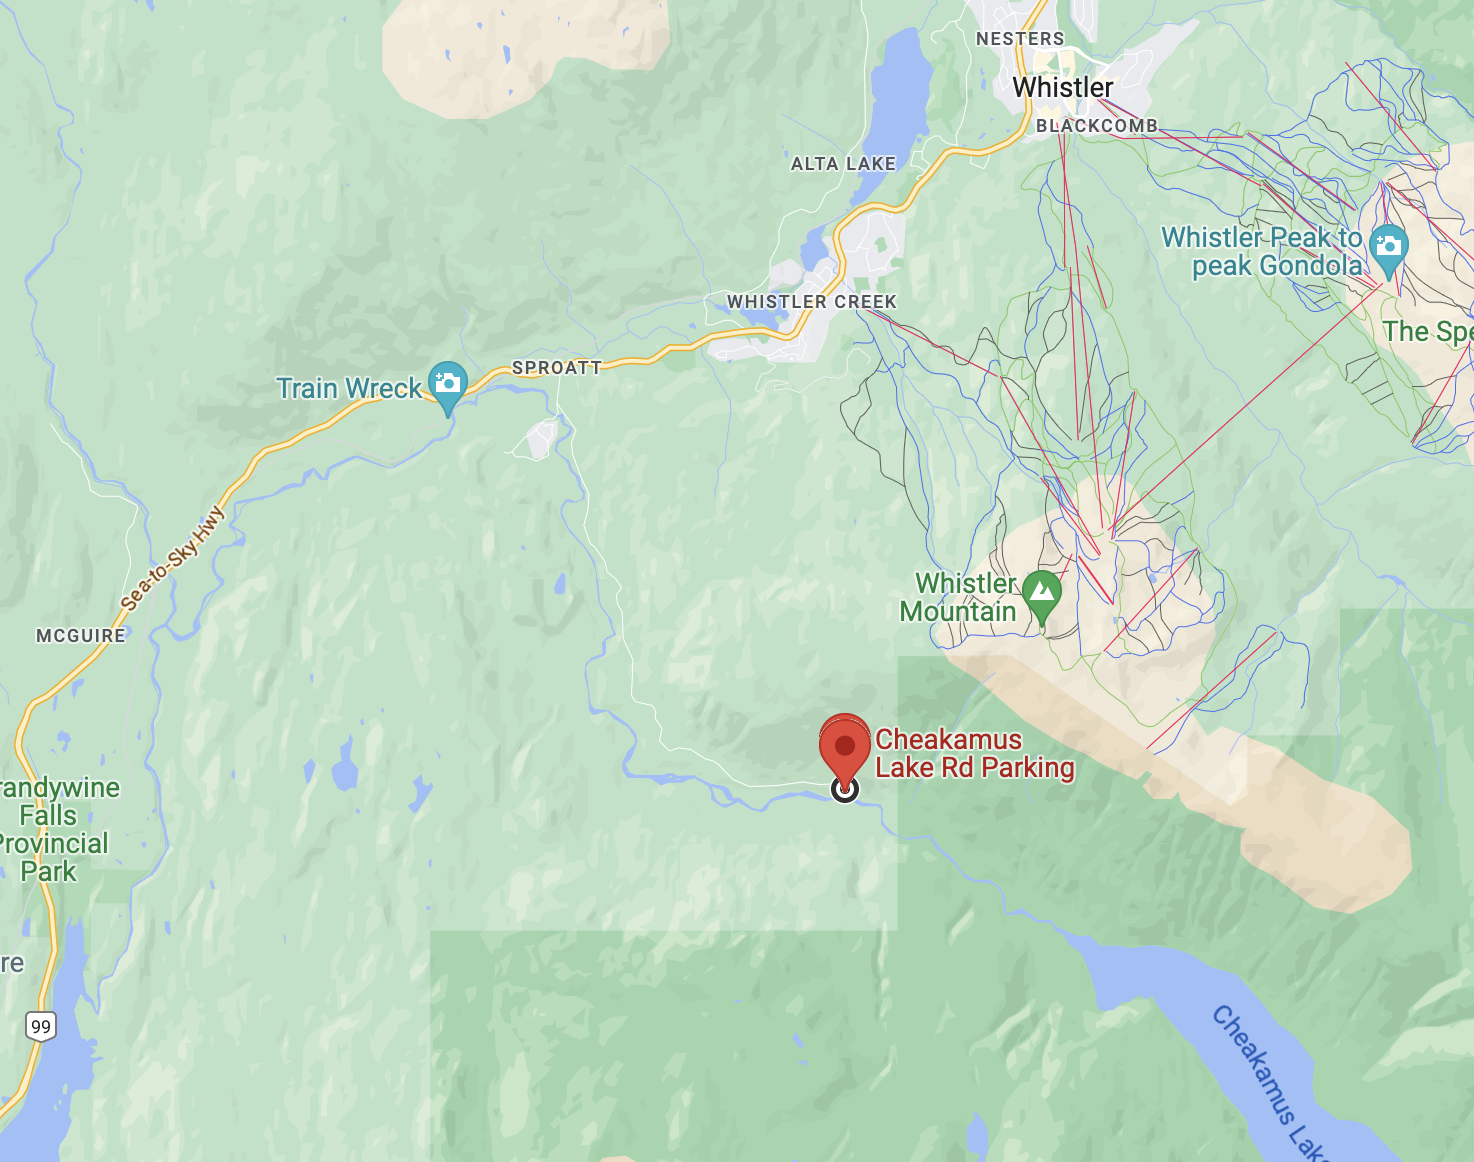
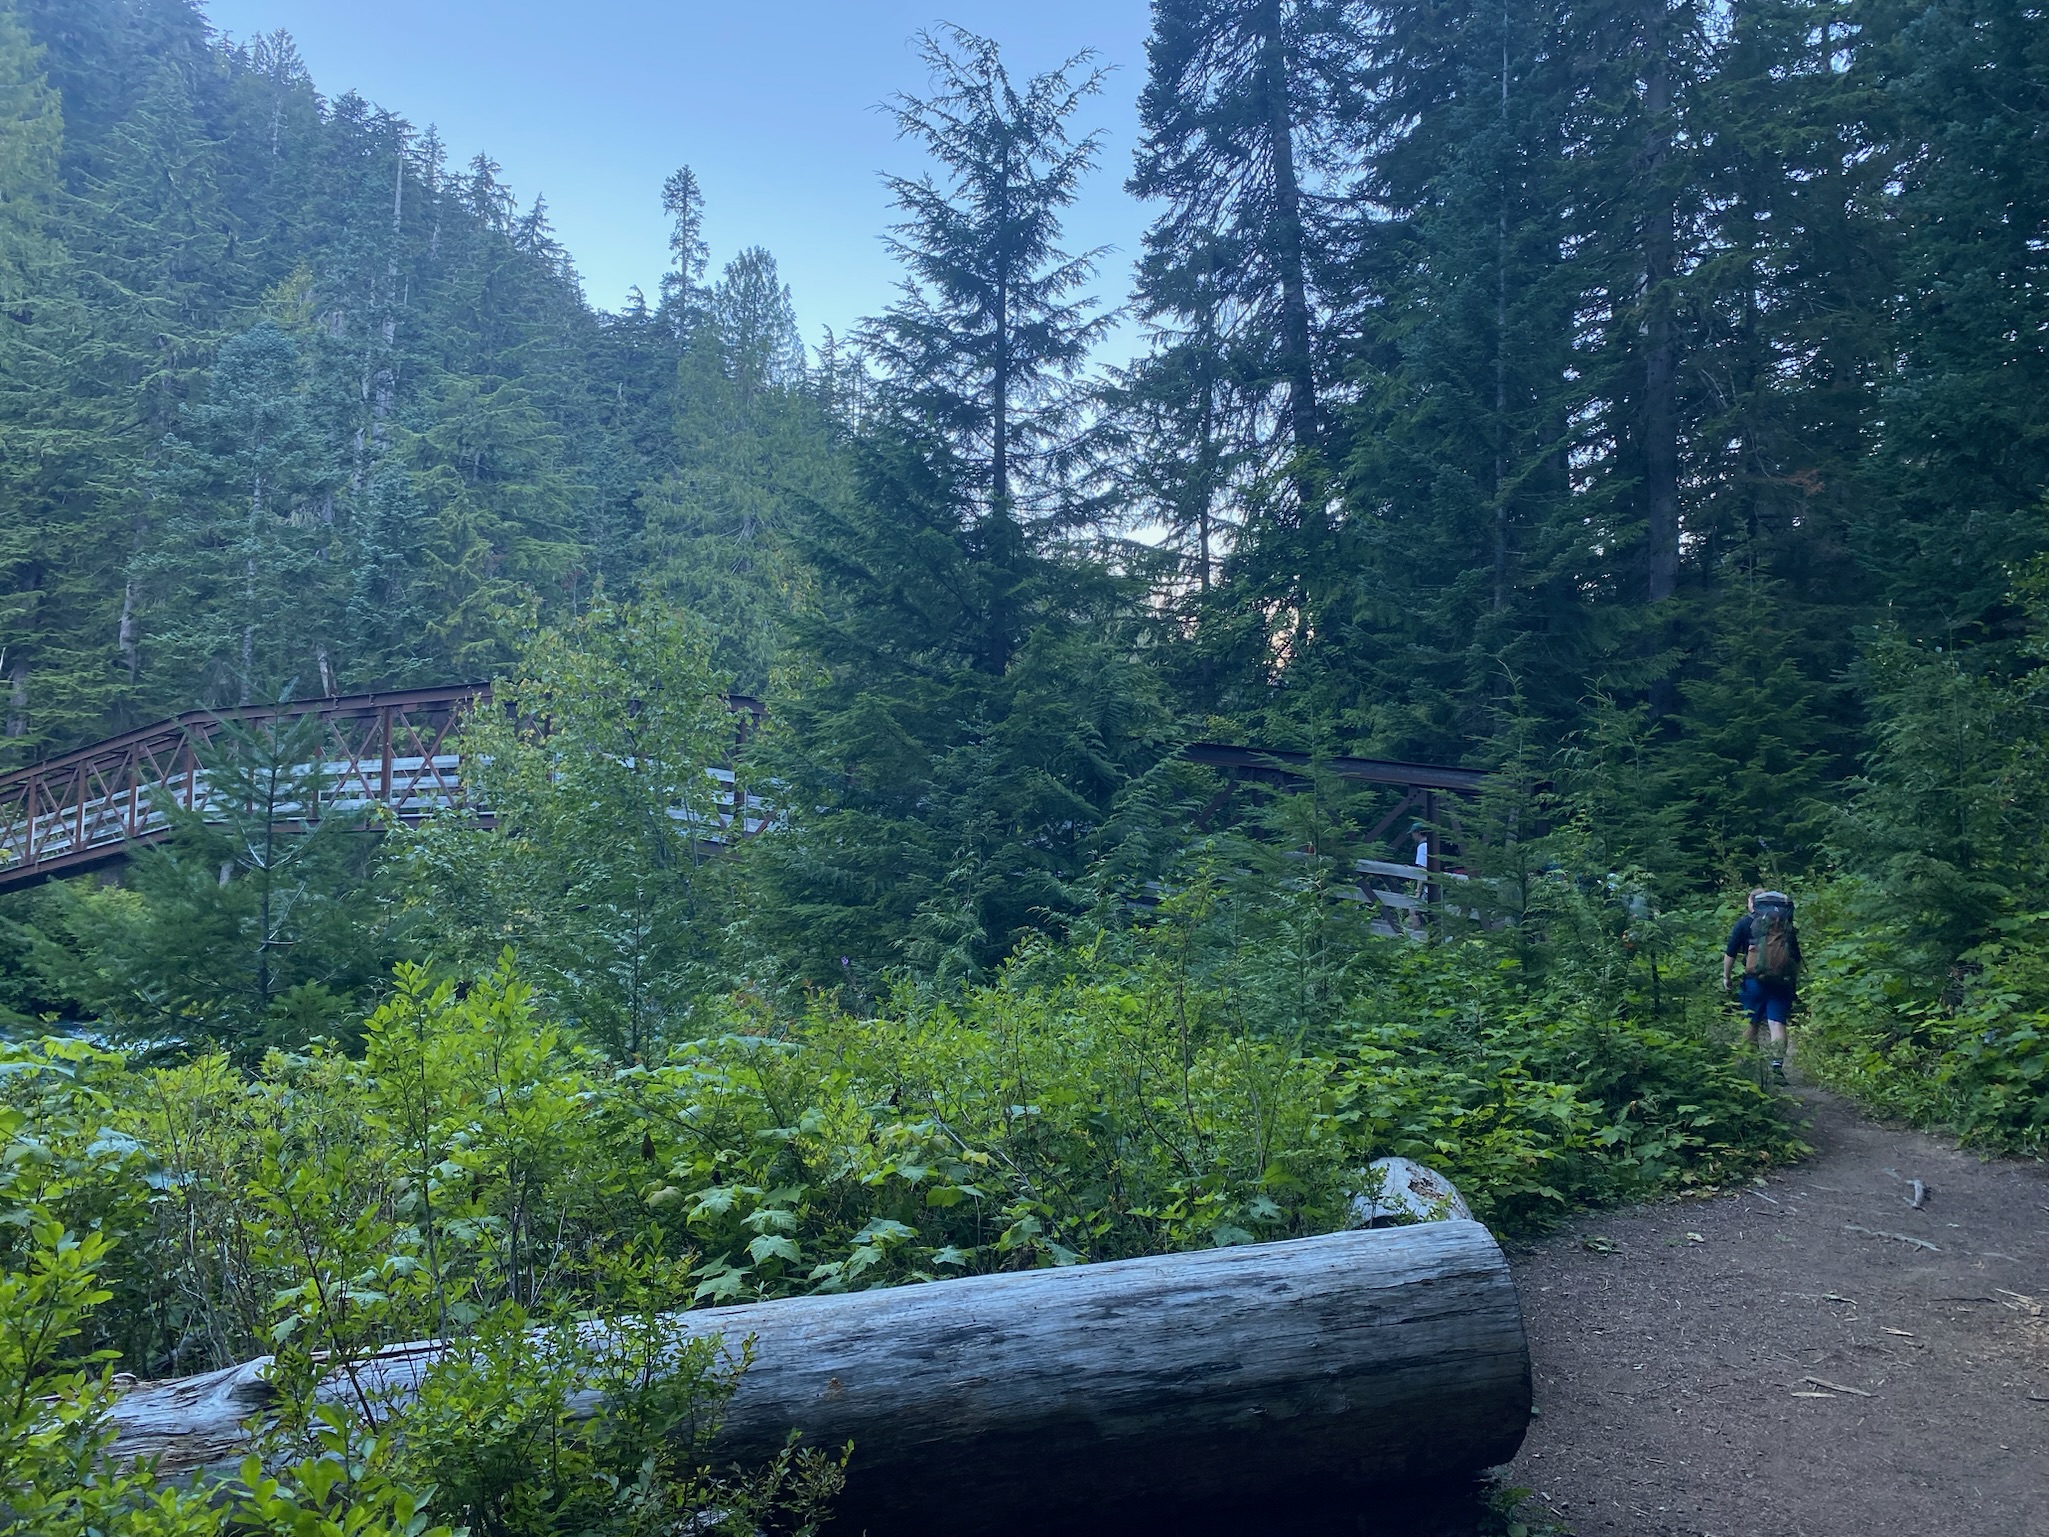
Cheakamus Lake
From Vancouver it is a 1hr 40 minute drive to Function Junction just south of Whistler village. Once you arrive in Function Junction, take a left turn onto Cheakamus Lake Road and follow for a few minutes. On your left hand side will be a fire service road, follow this track all the way down to the car park. It is a dirt track with a lot of pot holes and rocks so take your time, depending on the car you have and the speed you drive it will take around 30 minutes to get to the parking lot.
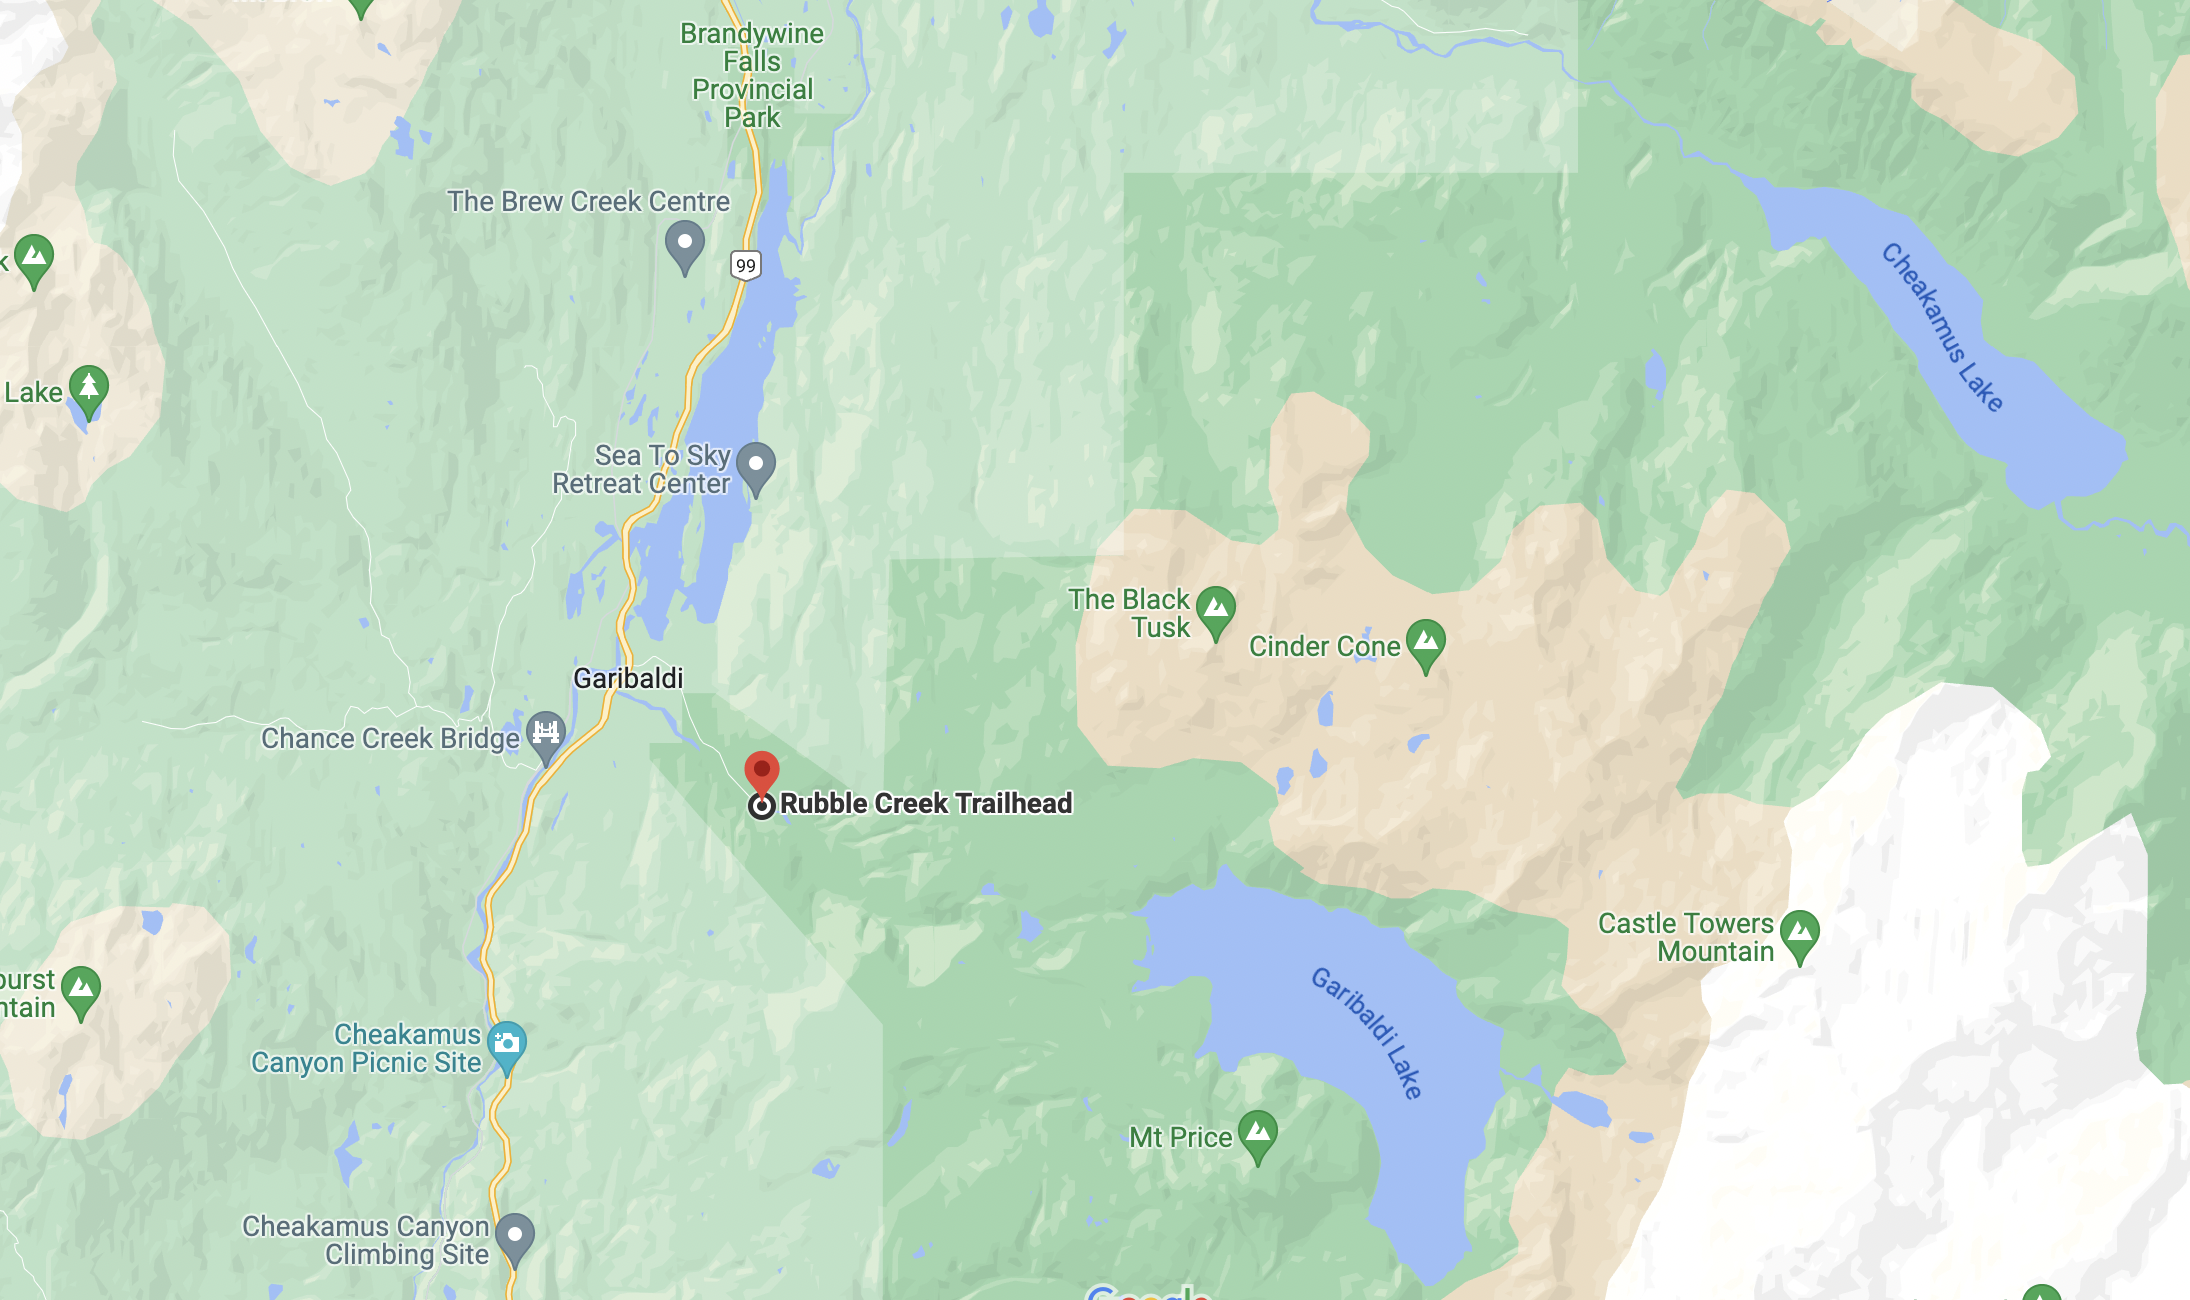
Rubble Creek
To get to Rubble Creek from Vancouver it is a 1 hour 20 minute drive along the sea to sky highway to Garibaldi, just south of Daisy Lake. Take a right turn onto Daisy Lake Road and you will arrive at the Rubble Creek trail head in 5 minutes.
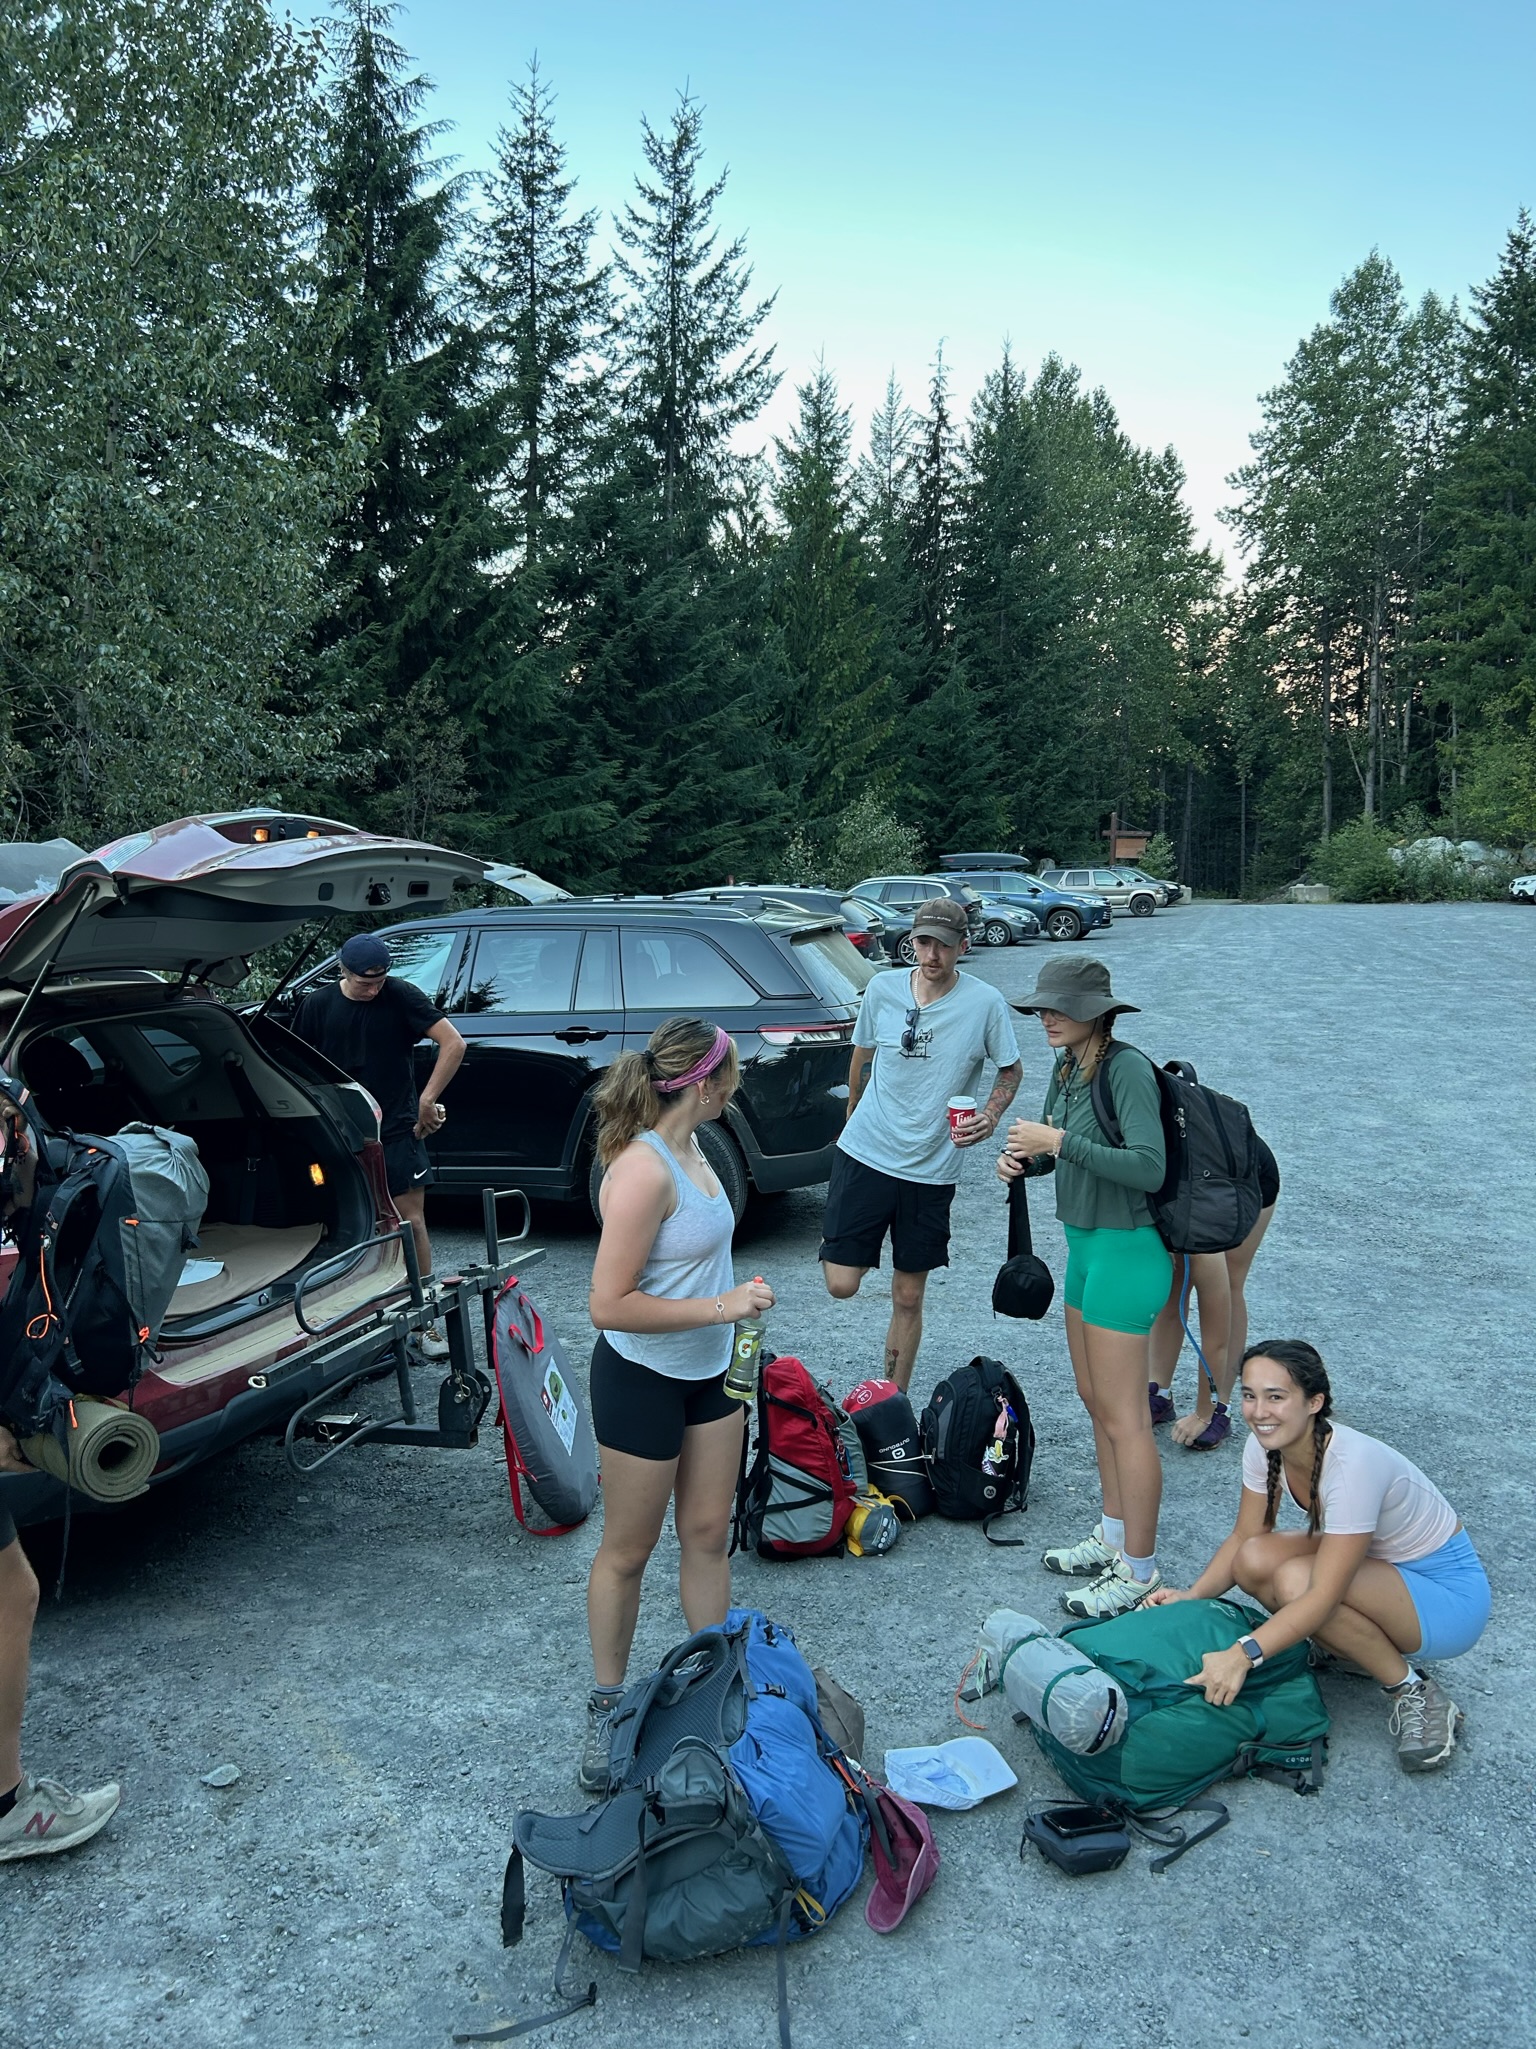
Can I Get to The Trailhead Without a Car?
The easy answer would be no, but not everyone who comes to Canada has the ease of having a car with them. If you don’t have a car or have been unable to hire one, it is possible but will be a difficult start to the day.
You could choose to get the number 20 bus from Whistler Village and start the hike from Cheakamus however this will add another 14km(!!) to your hike so I wouldn’t recommend.
Your best option would be to head over to one of the many Whistler Facebook pages and ask if anyone else is going at the same time and could give you a lift.
Panorama Ridge – The Details
Distance: 30km return
Difficulty: Difficult
Dog Friendly: No
Elevation Gain: 1,610m
Duration: 11 hours
Highest Point: 2,133m
Season: Year Round but Summer Preferable
How Much Time Do I Need to Hike Panorama Ridge
This is always a common question asked for a lot of hikes, how much time do I need. It is always down to the individual, do you want to get it over and done with or savour every precious moment in the alpine. This hike will be a minimum of 8-11 hours if you are looking to complete it in one day, otherwise you can take as long as you wish.
We also wanted to hike Black Tusk on our trip so we dedicated two days to our Panorama Ridge adventure which then gave us enough time to hike Pano for sunrise!
If you only have one day to hike Panorama though don’t worry this can easily be done in a day, taking around 8-11 hours to complete. My biggest tips are start as early as you feel comfortable to make the most of the daily sunshine and take plenty of supplies with you for the day.
Where to Camp
There are three different campsites that can be booked for your Panorama Ridge adventure on the BC Parks website.
- Taylor Meadows – 7.5km from Rubble Creek trailhead and 13.5km return to Panorama Ridge.
- 40 tent platforms
- Pit toilets
- Hanging food facilities
- Two day use cooking shelters with picnic tables and grey water sink facilities
- Garibaldi Lake – 9km from Rubble Creek trailhead and 13.4km return to Panorama Ridge.
- 50 Tent platforms
- Pit toilets
- Hanging food facilities located in the shelters
- Four day use cooking shelters with picnic tables and grey water sink facilities
- Helm Creek – 8.5km from Cheakamus Lake trailhead and 14.8km return to Panorama Ridge
- 30 Tent platforms
- Pit Toilet facilities
- Bear boxes and hanging food facilities.
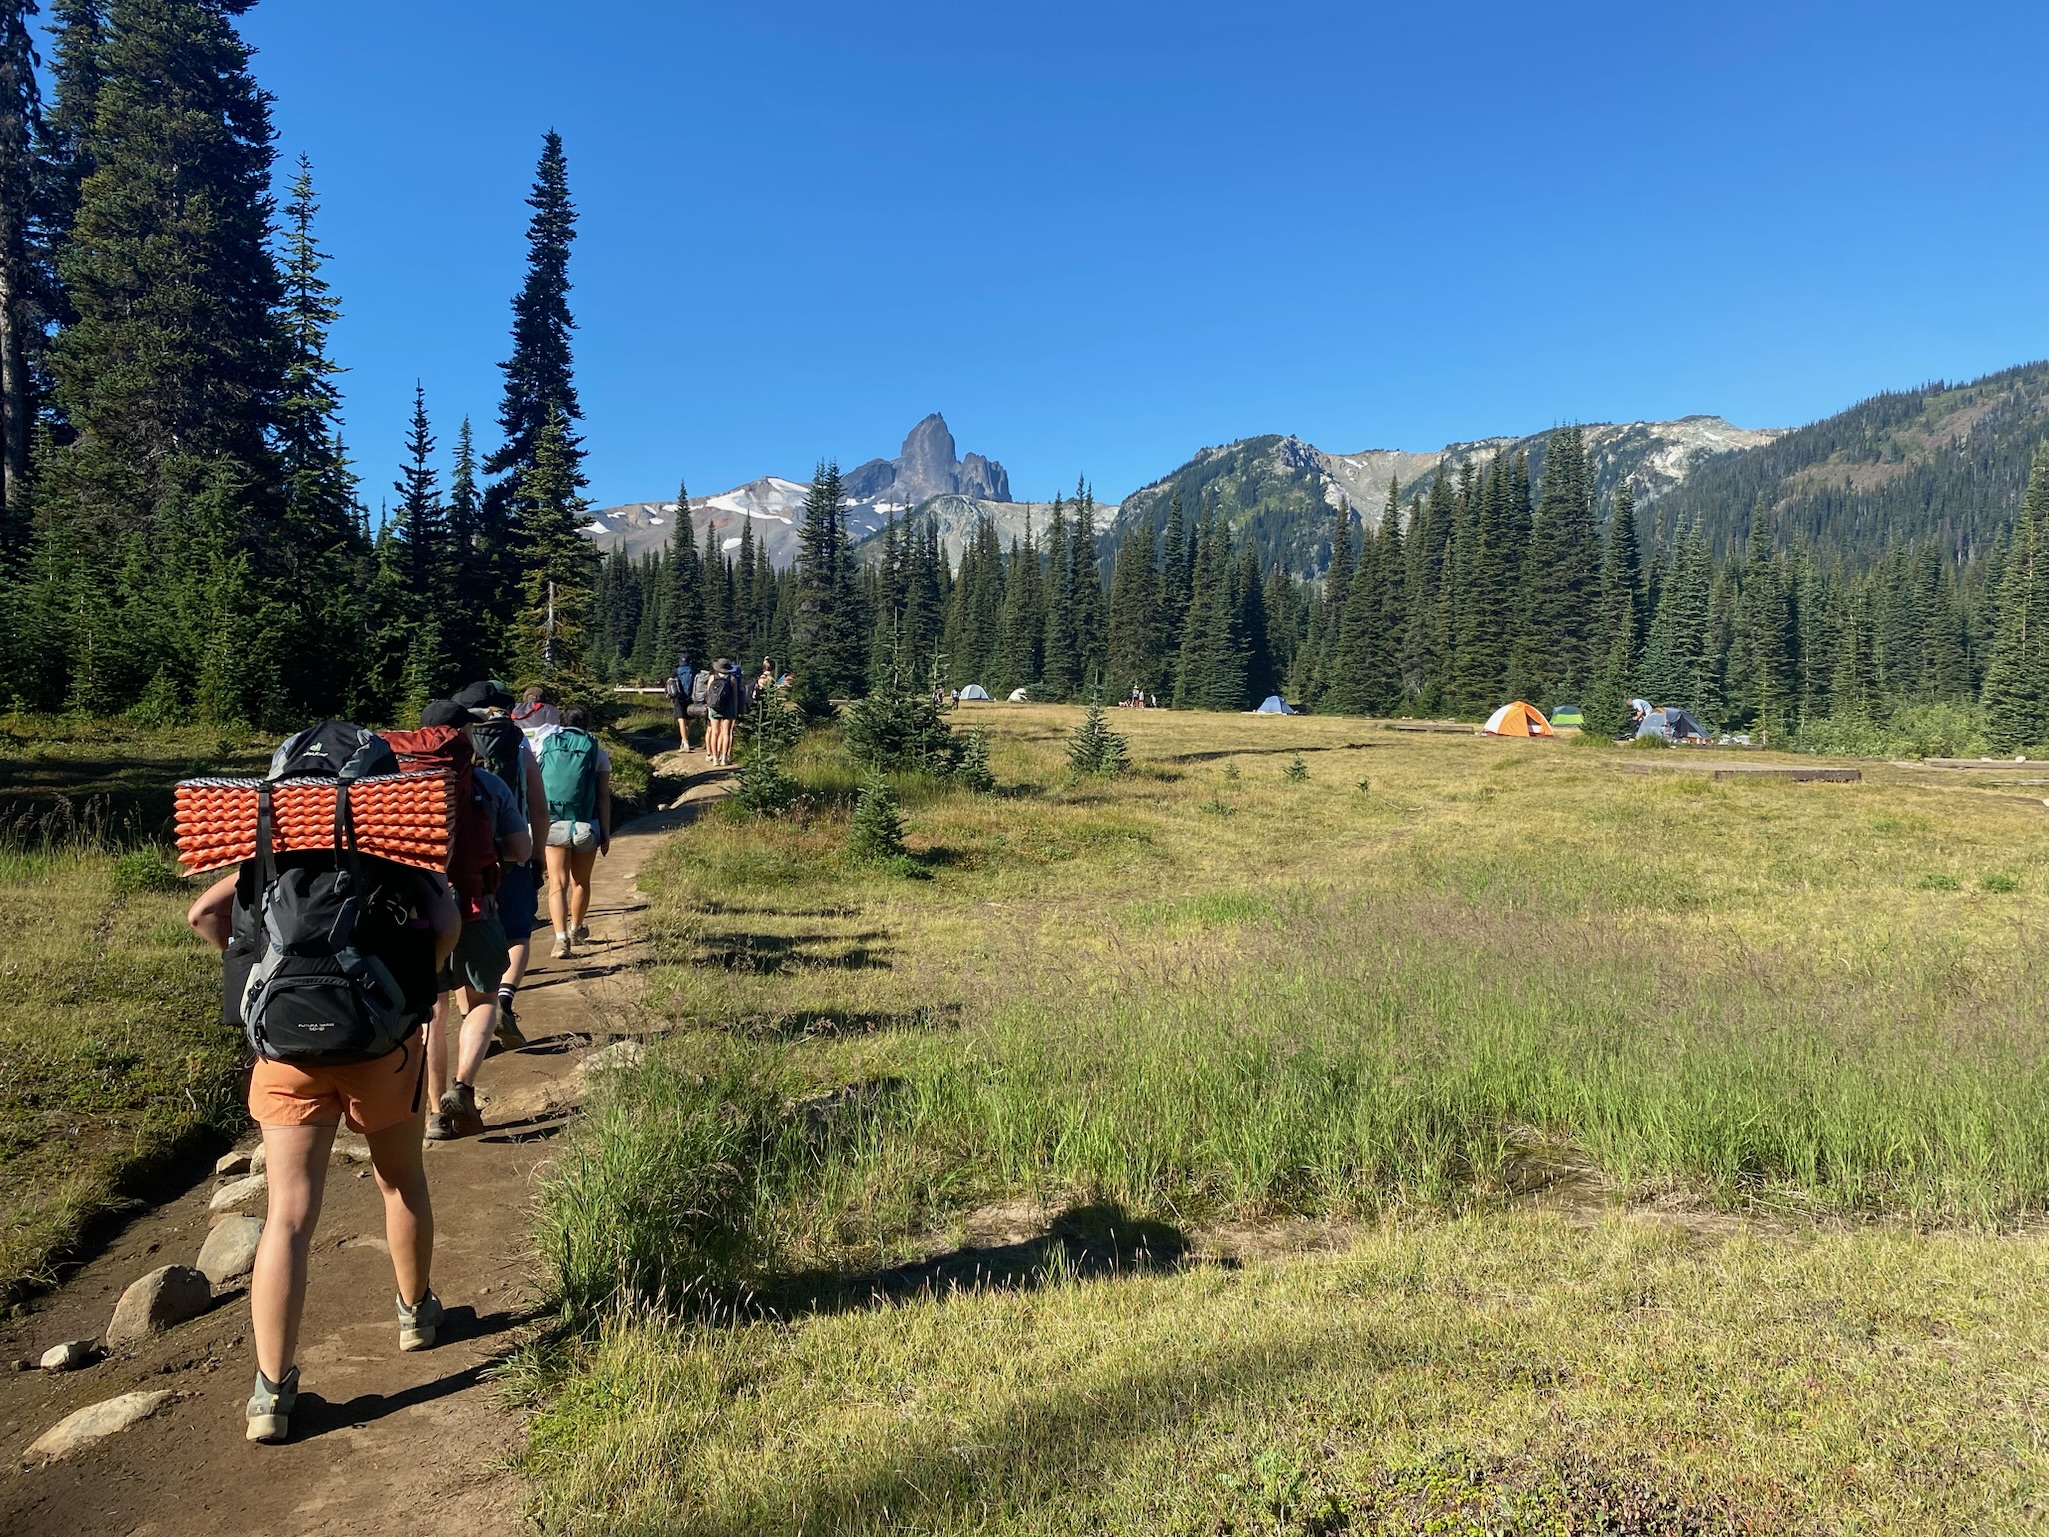
- Beautiful view of Black Tusk
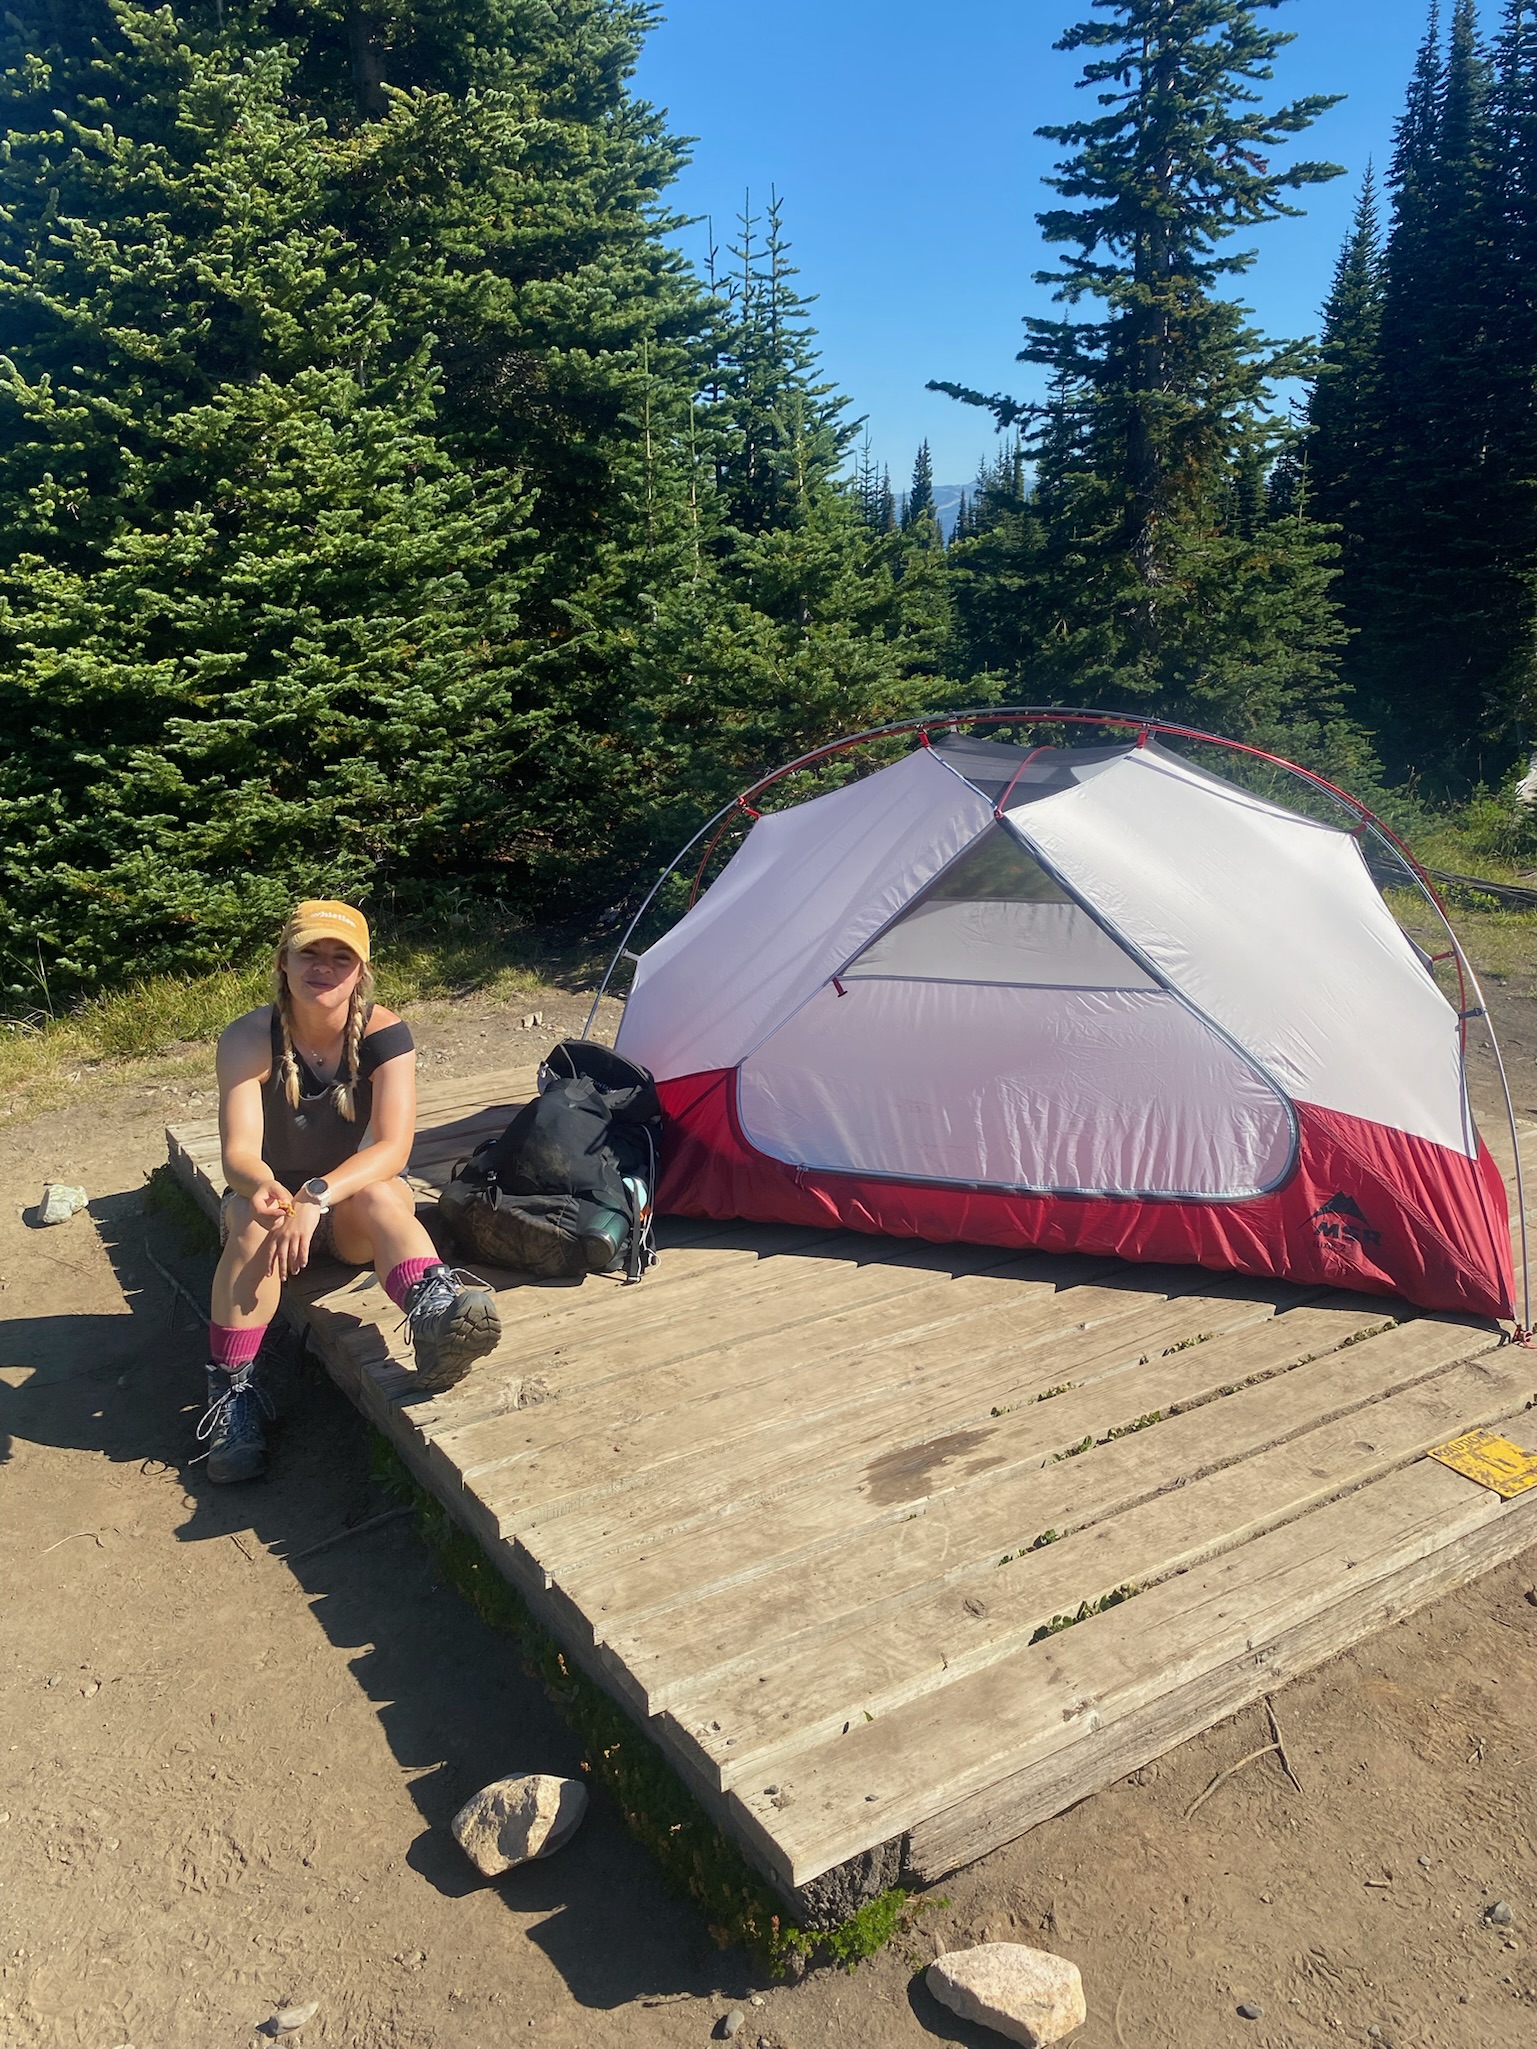
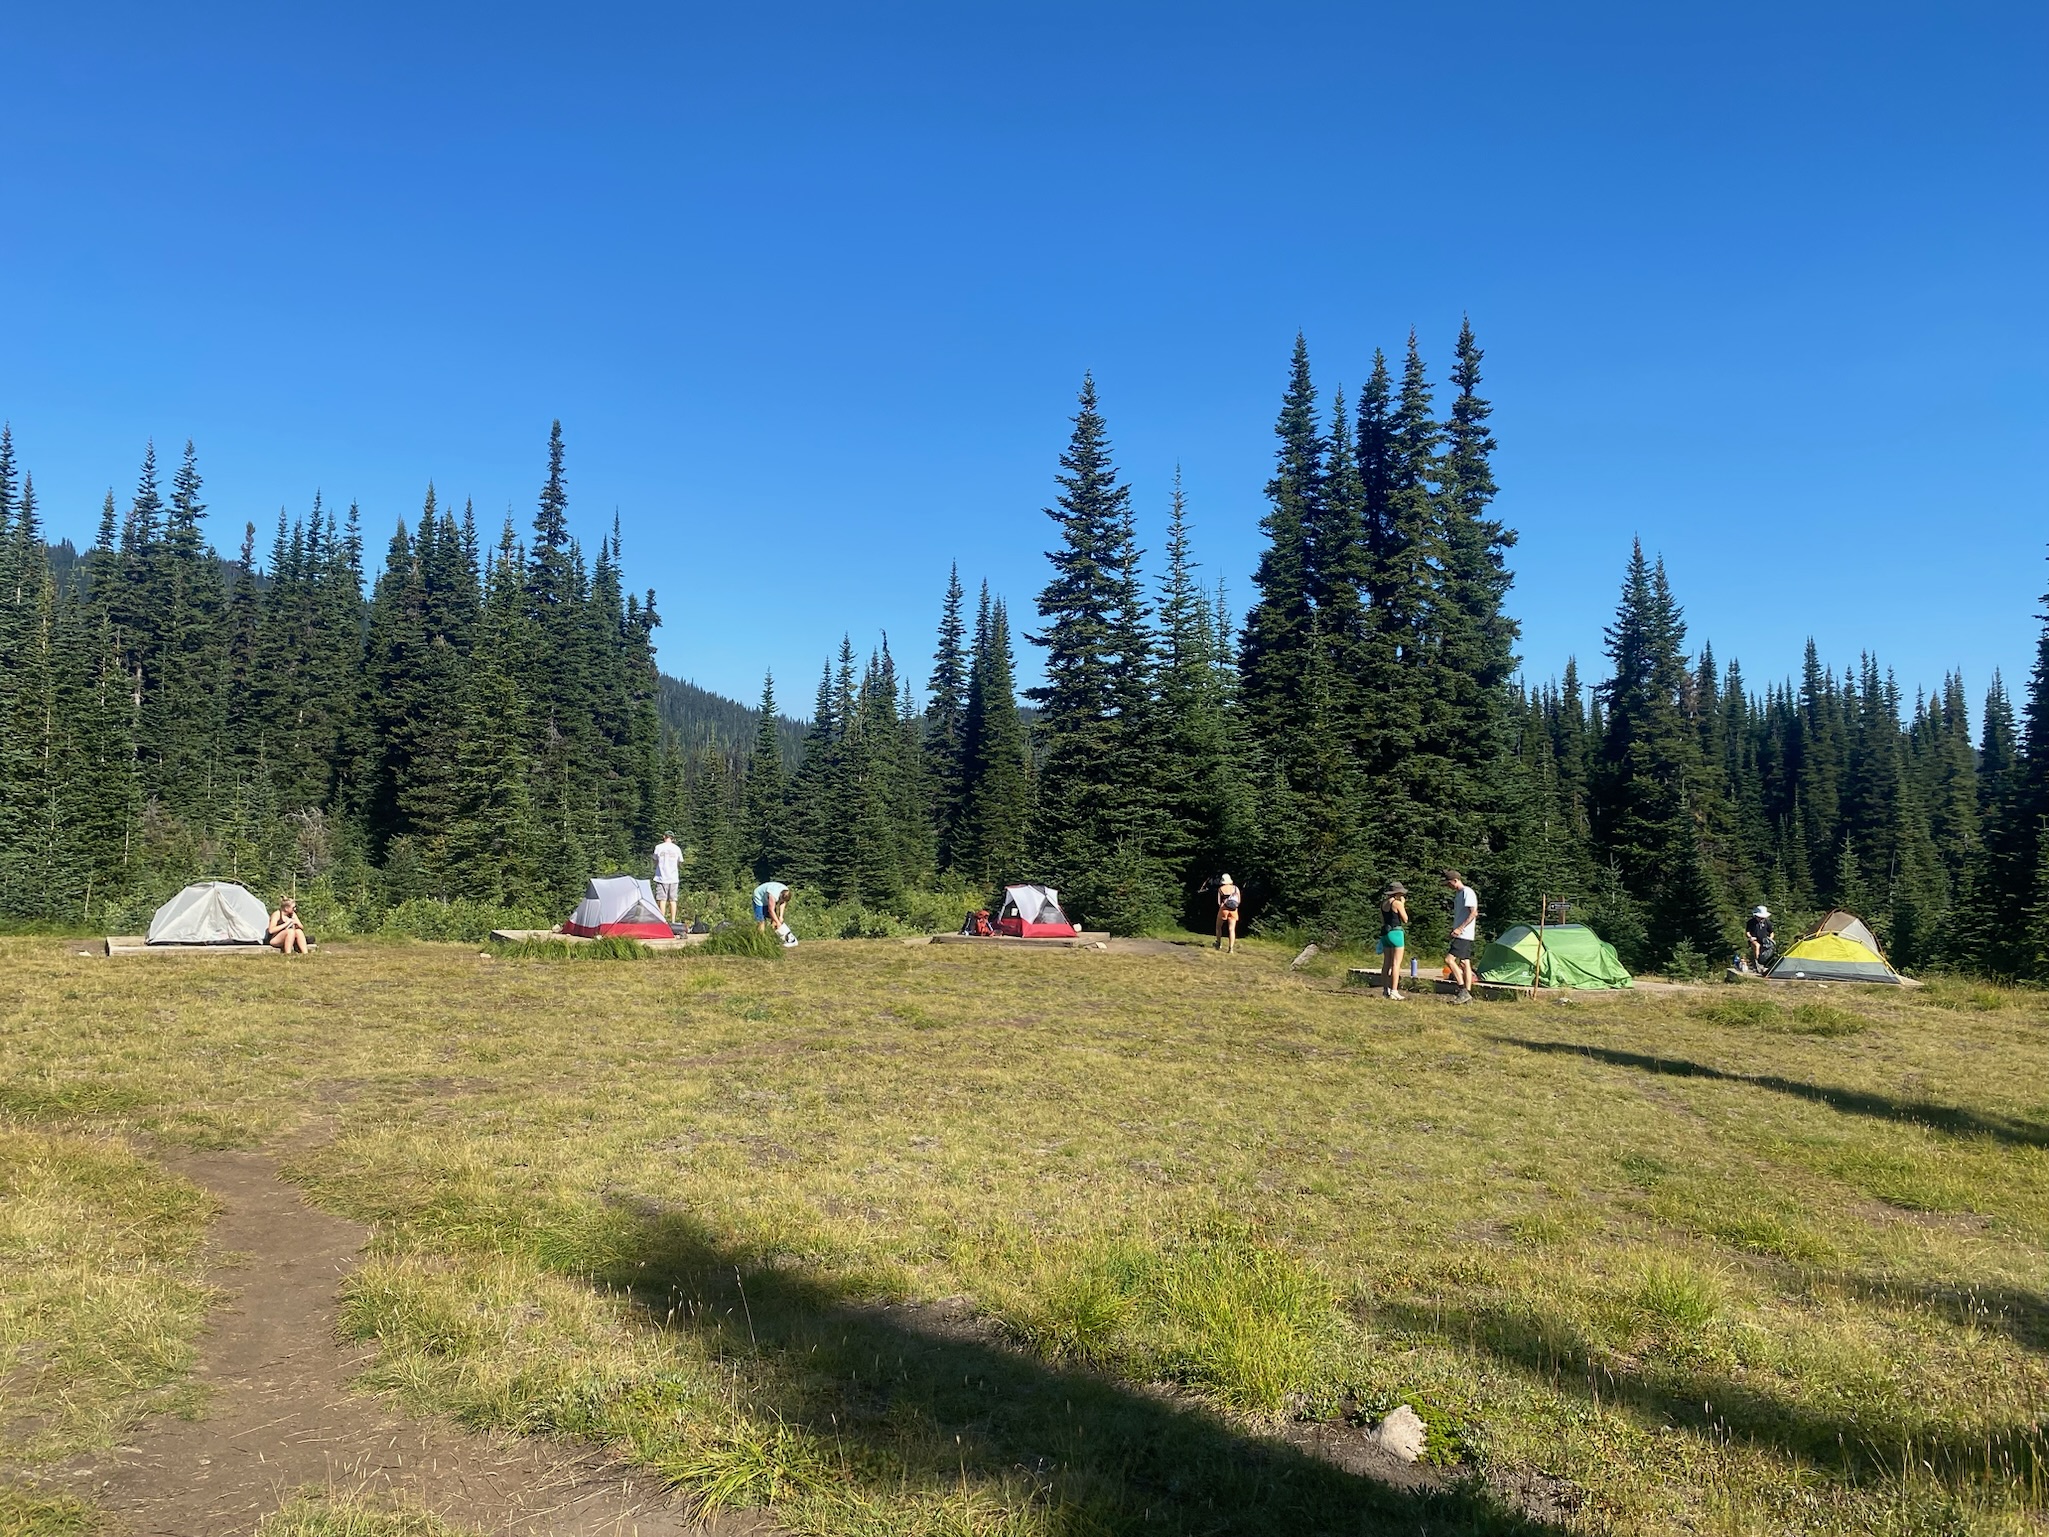
Taylor Meadows and Garibaldi Lake campground are the two most popular due to their cooking shelters and higher number of tent pads. By the time we organised our trip there was only enough spots at Helm Creek campground, but we absolutely loved it. Located right next to a glacial stream (perfect for that cold water after hike dip) with a great view of Black Tusk in the distance. There was plenty of space too so didn’t feel like we were camping near any others.
How to Store your Food
The entirety of British Columbia is known to be bear country and any camping within the area increases the likelihood of a bear encounter. One of the biggest bear attractants is rubbish and of course food.
When camping in bear territory it is extremely important to not leave any food or perfumed items within your tent.
But if you can’t leave it in your tent where can you leave it?
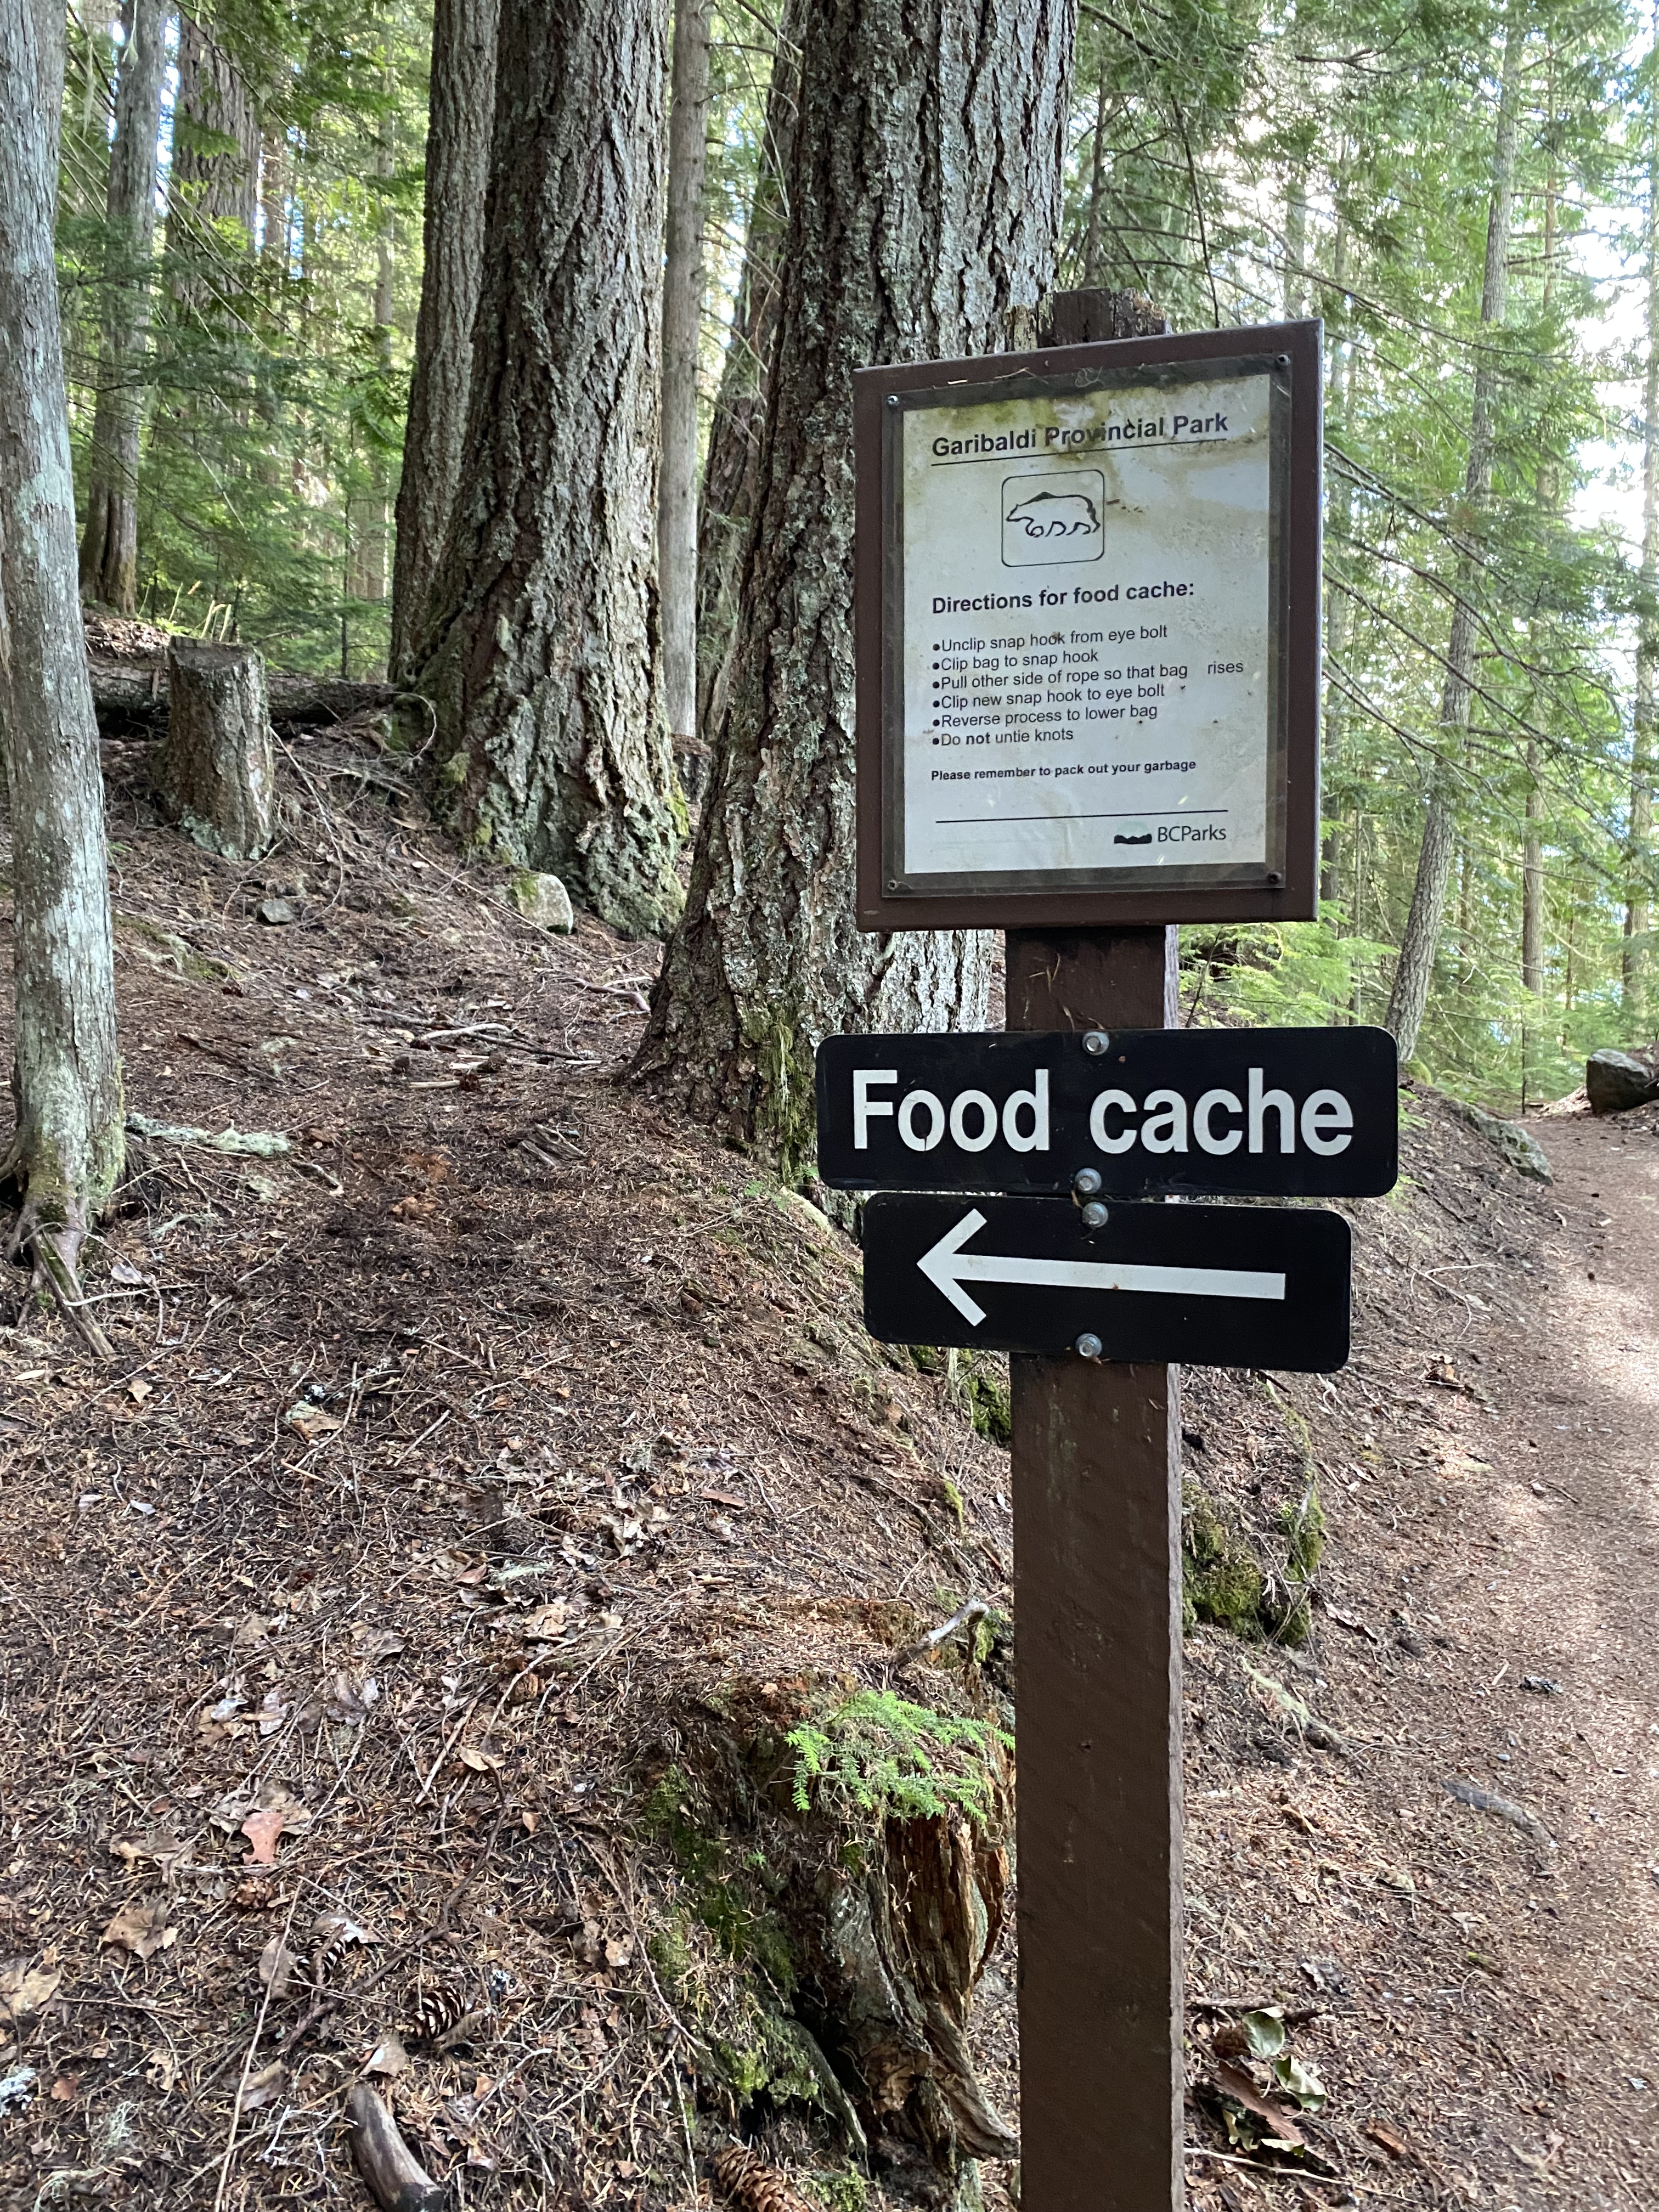
You are high up in the alpine therefore leaving it in your car is out of the question, because of this rangers have added bear boxes and lines to hang your bags up in the trees at each of the campsites within Garibaldi. These are the perfect solution to store your food and rubbish while camping. Of course you can have food around your tent when it is time to eat but all other times they should be stored away. You don’t want a surprise visitor in the middle of the night!
Are there Bathrooms?
There are facilities found at multiple locations along the trail.
You can find a pit toilet at both the Rubble Creek and Cheakamus Lake Trailhead. All of the campsites provide multiple pit toilets and a few can be found along the trail from Taylor Meadows. The rangers try their best to keep the areas well stocked but this cannot be expected, always take your own toilet paper with you.
Part of the thrill of hiking Panorama Ridge is being in the beautiful landscape of Garibaldi, it’s safe to say you won’t just stumble across a toilet anywhere. If you are nowhere near the locations mentioned above and nature calls there are some rules you need to follow.
For a #1 try to find rocks and gravel rather than soft grass and plants. That isn’t because it is toxic to the plant, rather that wildlife in the area may be attracted to it and dig up plant instead!
For a #2 you should be away form any water source and dig what is called a cathole, this can be with a trowel or with your boot heel. Try to dig to a depth of 15-20cm and 10-15cm wide, this is to avoid any animals digging it up in the future once you fill it up again.
Any toilet paper you use remember to pack out.
How to Reserve your Day Pass

To hike Panorama Ridge you will need to obtain a parks pass, they are required daily from 14th June to September 4th 2023. After this date they are required on weekends up until October 9th. Of course these dates vary year on year covering the busiest months.
The pass is to ensure that the trails don’t get too busy to help protect the environment and the wildlife.
If you book a camping spot for your trip the day pass is included, however you have to ensure that you have a copy of your pass with you at all times in case it is asked for by a ranger. I would recommend downloading it to your phone as there is sparse signal in the alpine.
The day passes are free to obtain and can be secured here. Now this is where it can get tricky, you can only guarantee a pass from 7am two days prior to the date you would like to go and this can be difficult, especially on weekends. Set your alarms for 650am and get ready to refresh, it felt like I was booking gig tickets for a Beyonce world tour!
What to Wear Hiking Panorama Ridge
It is always a big topic of conversation, what is the best thing to wear hiking! The honest answer is whatever you feel comfortable in, what is great for one person may be super uncomfortable for another. While hiking Panorama Ridge you could be hiking between 8-11 hours, that is a really long time so you want to be comfortable.
- Hiking Boots – First and foremost, DO NOT buy new boots for an upcoming long hike. Hiking boots as comfortable as they may be do need time to wear in and get used to your feet. Wearing brand new boots for a 30km hike is going to give you blisters. I am sorry but it is true.
- Hiking Socks – Invest in a pair of good hiking socks, I don’t have specific brand I go for but blister preventing socks always works a charm for me.
- Hiking Trousers/Hiking Shorts – My go to is always a comfortable pair of hiking trousers as they are quick drying, lightweight and offer protection from the sun. If it is a very hot day (A bit like when we decided to hike during a BC heatwave), hiking shorts are also a good option but make sure to take plenty of sunscreen with you.
- Waterproof Trousers – Up in the alpine the weather can change very quickly, I always advise that you are prepared for every eventuality as you are far away from help. Waterproof trousers sometimes seem redundant on a scorching day but you will love yourself when the rain starts to pour.
- Sweat Wicking Top – A long day of hiking can really make you sweat, by choose a sweat wicking top not only are you keeping yourself comfortable but they regulate your body temperature helping you to avoid overheating.
- Waterproof Jacket – Why would you ever hike without one? The perfect addition for when the downpours arrive unexpectedly. Even if it isn’t raining, it is a great extra layer.
- Hat/Cap – A hat is always good to have with you as it protects your head, ears, eyes and neck from the suns glare. I recommend also carrying a warm hat if you decide to hike for sunrise to keep your head warm in the early hours.
- Thermals (Weather and time of year dependant) – This all depends on what time of day you are looking to hike and what time of year. If you plan includes a potential for a drop in temperate a thermal is a must. An easy layer to wear underneath to keep you nice and warm. Even if it just to wear while sleeping at night.
- Down Jacket – Once again this is dependant on your plan, I took a down jacket with me for our time at the peak in the morning sun.
How Much Water Should I Take?
The standard while out hiking is to carry 1 litre of water per 2 hours hiking. This is always situational, if you are hiking in a heat wave make sure to carry more. 11 hours hiking in the alpine you would expect to carry 5.5 litres of water, that is a lot of added weight to your bag especially if you are planning on camping.
For hikes like this I highly recommend carrying two water bottles alongside a portable water filter. We had the Katadyne BeFree 1 litre, which was perfect to fill at any flowing water we passed to refill our water bottles!
At the Helm Creek campground we were located right next to a flowing stream which allowed us all to refill all our bottles at the start and end of the day.
Leave No Trace
Leave No Trace is a Canadian non-profit organisation that wants to education people to go outside and enjoy the great outdoors Canada has to offer. All while following their 7 principles to look after the landscape.
The seven principles have been thoroughly researched and designed to ensure that we enjoy our experience in nature while keeping the natural places just that, natural. You can check them out here.
Pack out what you pack in, be considerate of wildlife and other people you encounter on your adventures!

Top Tips to Reach the Summit For Sunrise
- Get up 30 minutes earlier than you think – This may sound unnecessary as you have most likely planned for all eventualities, but it won’t harm. The sun was set to rise from the peak at 6am the day of our hike and around 3 hours to hike from our camp site. There are a few things to take into consideration… you will be hiking for 3 hours in the dark and the skies will slowly light up during twilight before the sun actually rises.
- Take enough layers – Without the warm touch of the suns rays, it is a lot colder hiking during the night. This particular trail is up in the alpine so is already colder before you reach the summit. Make sure you take enough layers to keep nice and warm on your hike.
- Research the trail – Ensure you are aware of the terrain and the direction of travel before starting hike.
- Hike as a group – This increases safety during night time hikes especially in bear territory as you will make more noise keeping any wildlife at a distance.
- Be wildlife aware – A lot of wildlife will avoid the heat of the day and will use the cool temperatures of the evening to venture out and look for food. Do not be alarmed if you come across any wildlife on a nighttime hike, ensure you make plenty of noise to make any nearby wildlife aware of your presence. Always ensure to follow precautions when hiking in bear country, if you aren’t sure head to my post Staying Safe While Hiking in Bear Country for some great tips!
- Don’t forget your head torch – It is a bit obvious, but make sure you have your head torch (or any type of torch for that matter) as you won’t be getting far without it!
- Pack Breakfast – We packed a breakfast wrap each with a cup of tea to enjoy while watching sunrise. When we woke up at 2am we definitely weren’t ready for breakfast.
- As with any hike ensure to follow the Leave No Trace principles.
Do You Think You Are Ready?
This is hands down the best hike I have done during my summer in British Columbia, it’s true. Just look at that view and those colours, you can’t miss it! I hope this post has prepared you for you Panorama Ridge adventure and if it hasn’t, what else would you like to know? Send me a message and I would love to help.
Happy Hiking!
